On this page, you’ll find a complete archive of the recipes that have previously appeared on Sweetest Kitchen.
You can read more about our acquisition of Sweetest Kitchen here.
Use the table of contents to jump to a specific recipe.
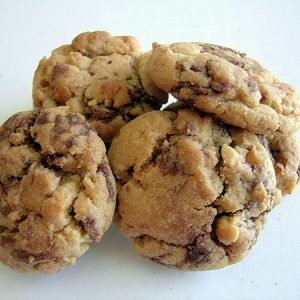
Peanut Butter & Nutella Cookies
The original Nutella-swirled peanut butter cookie recipe.
PrintServings: 40 cookies
Ingredients
- 1/2 cup unsalted butter softened
- 3/4 cup peanut butter I used crunchy, but you can use smooth
- 1/2 cup white sugar
- 1/2 cup packed brown sugar
- 1 egg
- 1/2 teaspoon vanilla extract
- 3/4 teaspoon baking soda
- 1/4 teaspoon salt
- 1 3/4 cups all-purpose flour
- Approx. 1/4 cup Nutella optional
Instructions
- Combine butter, peanut butter, sugars, egg, and vanilla. Blend together very well.
- Add flour, baking soda and salt with mixer. If using Nutella, just drizzle it on top of the dough (use more or less to suit your taste) then swirl it through the dough with a butter knife. Chill dough 15 minutes in the refrigerator. Roll into balls by hand.
- Place on greased cookie sheet. Using a fork, press down the balls and create a criss-cross pattern. Bake in a preheated 350 degrees F (175 degrees C) oven until edges are very lightly browned (about 7 to 10 minutes). Don’t overbake.
Notes
If you’re out of eggs, check out my article on the best egg substitutes here.

Matcha Cocoa Cupcakes
Matcha and chocolate-swirled cupcakes with chocolate ganache glaze and matcha swiss meringue buttercream
PrintServings: 12 cupcakes
Ingredients
- For the cupcakes:
- 8 Tbsp butter melted (1 stick)
- 3 oz dark chocolate melted
- 3 eggs large
- 3/4 cup sugar
- 3/4 teaspoon vanilla extract
- 3/4 + 2/3 cups flour sifted
- 1 tsp baking powder
- Pinch of salt
- 1.5 tsp sifted unsweetened cocoa diluted with 2 Tbsp whole milk
- 1.5 tsp Matcha powder
- Chocolate ganache glaze:
- 3 oz dark chocolate
- 3 oz heavy whipping cream
- Matcha swiss meringue buttercream:
- 2.4 oz egg whites
- 4.8 oz sugar
- 5.3 oz unsalted butter room temperature
- 1.5 tablespoons matcha use more or less to suit your taste
Instructions
- For the cupcakes: Preheat oven to 350 degrees.
- Melt the butter and set aside. Melt the chocolate using a double-boiler.
- Beat the eggs with the sugar until blended. Add the melted the butter and vanill extract and mix well.
- In a separate bowl, sift together the flour, baking powder and salt and add to the butter/egg mixture. Beat until blended, but do not overbeat.
- Divide the batter in two halves. In the first half, add the Matcha tea, in the second the chocolate and cocoa diluted in milk. Stir each half until thorougly incorporated.
- Spoon chocolate mixture into cupcake liners, and spoon matcha mixture on top of the chocolate. Fill liners about 1/2 – 2/3 full. You can use a toothpick or knife to gently stir the colors together for a marbled effect, or you can leave as is.
- Bake in a preheated oven for 20-22 minutes. Test with a toothpick to make sure they are done.
- For the chocolate ganache glaze: Heat the whipping cream and chocolate in a small pan over low heat until melted. Do not boil. Remove from heat and sit aside until cooler. Dip tops of cupcakes into the ganache and sit aside to let ganache harden, or put into the refrigerator to harden it quicker.
- For the matcha swiss meringue buttercream: Put egg whites and sugar into the top of a double boiler over a pan of simmering water. Whisking constantly, cook until sugar has dissolved and mixture is warm (about 160 degrees).
- Pour heated egg whites into the bowl of an electric mixer fitted with the whisk attachment. Beat egg white mixture on high speed until it forms stiff (but not dry) peaks. Continue beating until fluffy and cooled, about 7 minutes.
- Switch to the paddle attachment. With mixer on medium-low, add butter two tablespoons at a time, beating well after each addition. Increase speed to medium-high; continue beating until frosting appears thick, about 3 minutes. Reduce speed to low; add matcha powder and continue beating 2 minutes to eliminate air bubbles.

Ingredients
- For the chocolate:
- 1 1/2 cups 273g chopped semisweet chocolate
- 2 tablespoons 32g peanut butter
- Pinch salt
- For the filling:
- 12 tablespoons or 3/4 cup (192g) peanut butter
- 1/3 cup 64g light brown sugar or powdered sugar
- 2 tablespoons 10g graham cracker crumbs, optional
- Pinch salt
Instructions
- Prepare a standard muffin tin with 12 paper liners.
- Combine chocolate, peanut butter and salt in a heavy-based saucepan over very low heat, or use a double-boiler, to melt the chocolate. Stir frequently. Remove from heat.
- Place 2 teaspoons melted chocolate in each cupcake liner and carefully spread it with the back of a spoon at the bottom and only 1/4 of the way up the liner. Repeat with all 12 liners.
- Place the chocolate-covered liners onto a plate in the fridge to firm up, for about 20 minutes.
- Meanwhile, prepare the filling: Stir together peanut butter, sugar, optional crumbs, and salt.
- The chocolate should be hard by now, so divide peanut butter paste into all 12 liners, about 1 heaping tablespoon (20g) per liner, pressing down gently to make sure the paste goes everywhere. Place in fridge to firm up, for about 20 minutes.
- Top with 2 teaspoons melted chocolate, spreading carefully so that none of the peanut butter can be seen.
- Let cups firm up in fridge for at least one hour before enjoying. Store in fridge or freezer.

Ingredients
- 2 ripe bananas cut into thin pieces
- 4 slices bread any kind will do
- 4 tbsp smooth peanut butter don't use extra smooth
- 2 tablespoons unsalted butter
- 4 slices streaky bacon optional, but recommended
Instructions
- Cook bacon (if using) in a non-stick skillet over medium heat until crispy. Reserve bacon and fat in the skillet.
- Butter one side of each bread slice, then flip buttered-side-down. Spread peanut butter on the un-buttered side of all slices. Place banana pieces on two bread slices. Add bacon (if using) atop bananas.
- Top with remaining bread slices, buttered-side-up, forming sandwiches. Warm skillet with leftover bacon fat (or oil/butter for vegetarian/vegan) over medium heat. Fry sandwiches on both sides until golden-brown and peanut butter slightly oozes (2-3 minutes per side).
- Let sandwiches rest briefly before slicing. Serve promptly and enjoy.
Notes
Optional: Use gluten-free bread or almond/cashew butter for dietary adjustments.

Ingredients
- 2 servings uncooked spaghetti maybe a little more?
- 2-4 tablespoons olive oil
- 1-1 1/2 teaspoons dried parsley
- 1-1 1/2 teaspoons dried basil
- 2 cloves garlic minced
- 2 ounces baby portobello mushrooms or button, finely chopped
- Grated Parmesan cheese
Instructions
- Meanwhile, cook spaghetti according to package directions. Drain. Toss with mushroom mixture until thoroughly coated. Serve with a sprinkling of grated Parmesan cheese.

Matcha Strawberry Cupcakes
Matcha cupcakes with strawberry jam filling and strawberry buttercream.
PrintServings: 12 cupcakes
Ingredients
- Cupcakes:
- 3/4 cup + 2 tablespoons cake flour not self-rising
- 1/2 cup + 2 tablespoons all-purpose flour
- 1 cup sugar
- 1 1/2 teaspoons baking powder
- 1/2 teaspoon salt
- 1 tablespoon fresh matcha powder
- 1/2 cup unsalted butter softened, cut into 1-inch cubes
- 2 large eggs
- 1/2 cup whole milk
- 1/2 teaspoon pure vanilla extract
- Strawberry jam or preserves
- Buttercream:
- 2 large egg whites
- 1/2 cup + 2 tablespoons sugar
- 1 1/2 sticks unsalted butter softened, cut into small pieces
- 3/4 cup fresh strawberries pureed
Instructions
- For the cupcakes: Preheat oven to 325 degrees. Line cupcake pans with paper liners; set aside.
- In the bowl of an electric mixer fitted with the paddle attachment, combine flours, sugar, baking powder, salt and matcha powder; mix on low speed until combined. Add butter, mixing until the cubes of butter are peanut-sized or a little smaller.
- In a large glass measuring cup, whisk together eggs, milk, and vanilla. With mixer on medium speed, add wet ingredients in 3 parts, scraping down sides of bowl before each addition; beat until ingredients are incorporated but do not overbeat.
- Divide batter evenly among liners, filling about 2/3 full. Bake until a cake tester inserted in the center comes out clean, 17 to 20 minutes.
- Transfer to a wire rack to cool completely. Once cupcakes have cooled completely, using the cone method, fill cupcakes with strawberry jam or preserves.
- For the buttercream: Place whites and sugar in a heatproof mixer bowl set over a pot of simmering water. Whisk until sugar dissolves and mixture registers 160 degrees on a candy thermometer.
- Remove from heat, and attach bowl to a mixer. Whisk on medium speed for 5 minutes. Increase speed to medium-high, and whisk until stiff, glossy peaks form, about 6 minutes. Reduce speed to medium, and add butter, 1 piece at a time, whisking well after each addition.
- Switch to a paddle attachment. With mixer on low, add strawberry puree, and beat until smooth, 3 to 5 minutes. Use immediately, or cover, and refrigerate for up to 3 days. Bring to room temperature, and beat on low speed until smooth before using.
Notes
Because of the egg whites and jam in these cupcakes, it is best to store them in the refrigerator. Let them return to room temperature again before enjoying. Wondering what’s best to cover your dough? Check out my full guide on using plastic wrap or a towel to cover dough.

Ingredients
- Donuts:
- 1 tin refrigerated buttermilk biscuit dough
- Vegetable oil
- IGlaze:
- 2 tablespoons + 2 teaspoons unsalted butter softened
- 1 cup confectioners’ sugar
- 1/4 teaspoons pure vanilla extract
- 2 tablespoons + 2 teaspoons hot water
- 1/2 cup semisweet chocolate chips
- Sprinkles optional
Instructions
- For the donuts: Pour enough oil to cover at least 2 inches in the bottom of a heavy pan. Using a deep fry thermometer, heat oil to 375F. Do not leave unattended.
- While oil is heating, open biscuit tin and lay each biscuit on a cookie sheet. Flatten each one slightly with the palm of your hand. Use a small circle cutter to cut a hole in the middle of each biscuit; keep the holes, you can fry them as well. Let biscuit dough rest for 10 minutes.
- Carefully place donuts, one or two at a time, into the oil. Cook for about 1 minute on each side, or until golden brown. Using a slotted spoon, carefully lift donuts out of the oil and place onto paper towels to drain and cool completely. Once cool, coat the donuts in chocolate glaze.
- For the glaze: Combine the butter with the powdered sugar in a medium bowl and blend with an electric mixer.
- Add the vanilla and hot water. Mix until smooth.
- Melt the chocolate chips in a microwave-safe bowl in the microwave for 30 seconds. Stir, then microwave another 15-30 seconds and stir again until completely melted. Be careful not to burn the chocolate. Add to the plain glaze mixture. Blend until smooth.
- When the donuts have cooled, dip each top surface into the glaze and then flip over and cool on a plate until the glaze firms up, about 15 minutes. If desired, add some sprinkles!
Notes
If you’ve got leftover donuts, make sure to check my article on storing and reheating your leftover donuts.

Zombie Halloween Cupcakes
Spooky zombie hand Halloween chocolate pumpkin cupcakes with pumpkin filling and chocolate frosting.
PrintServings: 6 cupcakes
Ingredients
- Cupcakes:
- 1 cup + 2 1/2 teaspoons all-purpose flour
- 1/4 cup + 3 3/4 tablespoons cocoa powder
- 1 1/4 teaspoons baking powder
- 1/2 teaspoon baking soda
- 1 teaspoon ground cinnamon
- 1/4 teaspoon ground nutmeg
- 1/4 cup + 2 1/2 teaspoons buttermilk
- 1/2 cup + 1 tablespoon + 1 3/4 teaspoons pumpkin puree
- 1/2 teaspoon vanilla extract
- 2.25 ounces unsalted butter softened
- 1/2 cup + 1 tablespoon + 1 3/4 teaspoons dark brown sugar
- 1/2 cup + 1 tablespoon + 1 3/4 teaspoons granulated sugar
- 2 large eggs
- Oreo decorations:
- 7 finely crushed Oreo sandwich cookies
- 6 Oreo Fudgees sandwich cookies pulled apart and filling removed
- 12 zombie hand cupcake toppers from Bake It Pretty
- Pumpkin buttercream:
- 1/2 cup + 2 1/2 teaspoons unsalted butter room temperature
- 2 tablespoons + 1 1/8 teaspoons pumpkin puree
- 1/4 teaspoon ground cinnamon
- 1/8 teaspoon ground ginger
- 1/8 teaspoon salt
- 1/4 teaspoon vanilla extract
- 8 ounces confectioners’ sugar
- Chocolate buttercream:
- 1 stick unsalted butter softened
- 1/2 cup unsweetened cocoa powder
- 4 cups confectioners’ sugar
- 1/4 cup milk plus a few tablespoons to adjust consistency
- 1 teaspoon vanilla extract
Instructions
- For the cupcakes: Preheat oven to 350F; line a cupcake tin with paper liners.
- Sift flour, cocoa powder, baking powder, baking soda, cinnamon and nutmeg in a bowl; set aside.
- Combine buttermilk, pumpkin and vanilla in a bowl; set aside.
- Beat butter and sugars together in a large bowl with an electric mixer on medium speed until fluffy. Add eggs, one at a time, beating well after each addition, until the mixture is smooth and light. Alternately add flour mixture and buttermilk mixture, blending well after each addition.
- Divide batter evenly among cupcake liners. Bake for 18-22 minutes, or until a toothpick inserted in the middle comes out clean.
- Cool cupcakes completely, then using the cone method, fill cupcakes with pumpkin buttercream (recipe follows).
- Frost each cupcake with chocolate frosting (recipe follows), then dip the frosted tops into the finely crushed Oreos to evenly coat. Stick an Oreo Fudgee “tombstone” into the top of each cupcake, and place a zombie hand in front of it.
- For the pumpkin buttercream: With electric mixer, cream butter and pumpkin (mixture will look grainy). Turn mixer to low and add cinnamon, ginger, salt and vanilla. Slowly add 1/2 cup confectioners’ sugar at a time until the buttercream is creamy and no longer separating (the mixture will look grainy if there isn’t enough sugar mixed in).
- For the chocolate buttercream: Beat butter and cocoa until smooth, then add sugar 1 cup at a time, beating until smooth with each addition . Add milk and vanilla and beat for about 3 minutes.
Notes
Halloween is the perfect time of year for serving a massive bowl of chili – and make xtra because the leftovers are even better the next day! I even have a guide on how to make your chili less acidic.

Dulce De Leche Pumpkin Cupcakes
Pumpkin cupcakes with dulce de leche filling and dulce de leche buttercream.
PrintServings: 12 cupcakes
Ingredients
- Pumpkin cupcakes:
- 1 cup all-purpose flour
- 1/2 teaspoon baking soda
- 1/2 teaspoon baking powder
- 1/2 teaspoon coarse salt
- 1/2 teaspoon ground cinnamon
- 1/2 teaspoon ground ginger
- 1/8 teaspoon ground nutmeg
- 1/8 teaspoon allspice
- 1/2 cup packed light brown sugar
- 1/2 cup granulated sugar
- 1/2 cup 1 stick unsalted butter, melted and cooled
- 2 large eggs lightly beaten
- 7.5 ounces pureed pumpkin
- Dulce de leche:
- 1 14 oz can sweetened condensed milk
- boiling water
- Dulce de leche buttercream:
- 3/4 cup 1 1/2 sticks unsalted butter, softened
- 1 1/2 tablespoons heavy cream
- 1/2 teaspoon vanilla
- 2 cups powdered sugar
- pinch of salt
- 1/4 cup + 2 tablespoons prepared dulce de leche
Instructions
- For the pumpkin cupcakes: Preheat oven to 350 degrees. Line cupcake pans with paper liners; set aside. In a medium bowl, whisk together flour, baking soda, baking powder, salt, cinnamon, ginger, nutmeg, and allspice; set aside.
- In a large bowl, whisk together, brown sugar, granulated sugar, butter, and eggs. Add dry ingredients, and whisk until smooth. Whisk in pumpkin puree.
- Divide batter evenly among liners, filling each about halfway. Bake until tops spring back when touched, and a cake tester inserted in the center comes out clean, 20 to 25 minutes, rotating pans once if needed. Transfer to a wire rack; let cool completely.
- Once cooled, using the cone method, fill each cupcake with a dollop of dulce de leche and frost with dulce de leche buttercream. If desired, decorate cupcake with spiderweb design using 3 tablespoons chocolate chips melted together with 1/4 teaspoon shortening.
- For the dulce de leche: Preheat oven to 425 degrees F.
- Open up the can and pour the sweetened-condensed milk into a pie pan. Cover tightly with foil. Place into a larger pan and pour boiling water in larger pan & around pie plate (level of water should be about halfway up the pie plate). Don’t let any water seep up and into the pie plate.
- Place in oven and bake for 1 hour. At the one hour point, peel off foil and check for progress. If the mixture has thickened and turned a caramelly color, it’s done. If it doesn’t quite look thick enough or dark enough, cover it up and bake it a little longer (mine took 75 minutes).
- When the mixture appears to have turned into a nice, thick caramel, remove from the oven. Let sit for a few minutes, and then beat with an electric mixer until smooth.
- Dulce de leche buttercream: Cream together softened butter and powdered sugar on low using an electric mixer. Add cream and vanilla and beat on medium speed until smooth and no lumps appear. Scrape down the sides of the bowl. Add the prepared dulce de leche and beat to incorporate.

Ice Cream Sundae Cupcakes
Chocolate cupcakes with ganache filling and vanilla buttercream frosting, drizzled with ganache glaze. Topped with sprinkles and a cherry.
PrintServings: 12 cupcakes
Ingredients
- For the cupcakes:
- 1 cup sugar
- 3/4 cup + 2 tablespoons all-purpose flour
- 1/4 cup + 2 tablespoons cup cocoa powder
- 3/4 teaspoon baking powder
- 3/4 teaspoon baking soda
- 1/2 teaspoon salt
- 1 egg
- 1/2 cup milk
- 1/4 cup vegetable oil
- 1 teaspoon vanilla extract
- 1/2 cup boiling water
- Sprinkles for decoration
- Maraschino cherries for decoration
- For the ganache filling:
- 4 ounces semisweet chocolate
- 1/3 cup heavy cream
- 1 tablespoon butter room temperature
- For the vanilla buttercream:
- 6 ounces 1 1/2 sticks unsalted butter, softened
- 8 ounces confectioners’ sugar sifted
- 1/4 teaspoon pure vanilla extract
- For the ganache glaze:
- 3 ounces semisweet chocolate
- 1/3 cup heavy cream
- 1/2 tablespoon light corn syrup
Instructions
- For the cupcakes: Heat oven to 350°F. Line muffin cups (2-1/2 inches in diameter) with paper baking cups.
- Stir together sugar, flour, cocoa, baking powder, baking soda and salt in large bowl. Add eggs, milk, oil and vanilla; beat on medium speed of mixer 2 minutes. Stir in boiling water (batter will be thin). Pour batter into prepared pans.
- Fill cups 2/3 full with batter. Bake 22 to 25 minutes or until wooden pick inserted in center comes out clean. Cool 10 minutes; remove from pans to wire racks. Cool completely.
- Using the cone method, fill cupcakes with chocolate ganache (recipe follows). Frost with buttercream (recipe follows) using a round piping tip, then spoon chocolate ganache glaze (recipe follows) on top of buttercream. Put sprinkles on as soon as you finish putting the ganache on each cupcake, just in case the ganache hardens too much for the sprinkles to stick. Push a maraschino cherry into the top of each mound of frosting (the ones with stems make a better presentation!).
- For the ganache filling: Chop the chocolate and transfer it to a heatproof bowl. Heat the cream until simmering and pour it over the chocolate. Let it sit for one minute and then stir until smooth. (If this has not sufficiently melted the chocolate, you can return it to a double-boiler to gently melt what remains. 20 seconds in the microwave, watching carefully, will also work.) Add the butter and stir until combined.
- I put the ganache in the refrigerator to firm it up just a little teeny bit, about 15-20 minutes I think it was. It was still pourable, but it wasn’t dripping everywhere, either.
- For the vanilla buttercream: Beat butter with a mixer on medium-high speed until pale and creamy, about 2 minutes.
- Reduce speed to medium. Add sugar, 1/2 cup at a time, beating after each addition, about 5 minutes. (After every 2 additions, increase speed to high, and beat for 10 seconds, then reduce speed to medium-high). Add vanilla, and beat until buttercream is smooth.
- For the ganache glaze: Place chocolate in a medium-size heatproof bowl. Bring cream and corn syrup just to a simmer in a small saucepan over medium-high heat; pour mixture over chocolate. Let stand, without stirring, until chocolate begins to melt.
- Gently stir chocolate and cream until totally combined; begin near the center of the bowl and gradually work your way toward the edge, pulling in as much chocolate as possible, until the mixture is smooth and glossy.

Lemon Myrtle And Coconut Cupcakes
Lemon myrtle cupcakes drizzled with lemon myrtle syrup and topped with coconut frosting.
PrintServings: 14 cupcakes
Ingredients
- For the cupcakes:
- 170 g unsalted butter room temperature
- 1 cup sugar
- 3 extra-large eggs room temperature
- 3/4 teaspoon pure vanilla extract
- 3/4 teaspoon pure almond extract
- 1 1/2 cups flour
- 2 teaspoons ground lemon myrtle
- 1/2 teaspoon baking powder
- 1/4 teaspoon baking soda
- 1/4 teaspoon kosher salt
- 1/2 cup buttermilk
- 100 g sweetened shredded coconut
- For the lemon myrtle syrup:
- 1/2 cup sugar
- 1/4 cup water
- 1/2-3/4 teaspoons ground lemon myrtle
- juice from half of a lemon
- For the coconut frosting:
- 340 g cream cheese room temperature
- 3/4 cup confectioners’ sugar
- 2 tablespoons heavy whipping cream
- 2 tablespoons coconut cream
- 1/4 teaspoon salt
Instructions
- For the cupcakes: Preheat the oven to 325F (160C).
- In the bowl of an electric mixer fitted with the paddle attachment, cream the butter and sugar on high speed until light and fluffy, about 3 minutes. With the mixer on low speed, add the eggs, 1 at a time, scraping down the bowl after each addition. Add the vanilla and almond extracts and mix well.
- In a separate bowl, sift together the flour, lemon myrtle, baking powder, baking soda, and salt. In 3 parts, alternately add the dry ingredients and the buttermilk to the batter, beginning and ending with the dry. Mix until just combined. Fold in coconut.
- Line a muffin pan with paper liners. Fill each liner evenly with batter. Bake for 20-25, until the tops are brown and a toothpick comes out clean. Allow to cool in the pan for 15 minutes. Remove to a baking rack and cool completely.
- For the lemon myrtle syrup: Bring all ingredients to the boil stirring until sugar is dissolved. Strain lemon myrtle from syrup. Poke holes into the cupcakes with a fork, then either dip cupcakes into syrup or spoon the syrup over the cupcakes. This is best done when the cupcakes and syrup are still warm.
- For the coconut frosting: Using a mixer fitted with a paddle attachment, beat the cream cheese and powdered sugar in a large bowl on medium-high speed about 1 minute. Add the whipping cream, coconut cream, and salt; beat until combined. Frost cupcakes when they are completely cool.
Notes
Did you end up using too much lemon? If so – don’t worry! Check out my guide on toning down lemon flavors (it’s useful for all dishes).

Ingredients
- 3 tablespoons Nutella
- 3 tablespoons cream cheese softened
- pinch of salt
- 1/4 cup milk
Instructions
- Thoroughly mix Nutella, cream cheese and salt until no streaks of cream cheese remain. Mixture may be a little grainy-looking. Slowly add milk a bit at a time and stir until milk is thoroughly mixed in (you’ll need to mix for a while for it to come together). You should end up with a nice smooth, creamy dip for your fruit. Store in refrigerator. To soften up the dip after removing from the refrigerator, just stick it in the microwave for about 10-15 seconds.

Faux Hot Cross Buns
A simple, yet delicious recipe for faux hot cross buns. If you're not ready to delve into the world of yeasted buns, these muffins are a great alternative!
Print PinServings: 12 people
Ingredients
- 135 g chocolate chips
- 2 1/2 cups 375g self-raising flour
- 1/2 teaspoon bicarbonate of soda baking soda
- 2 teaspoons ground cinnamon
- 1/2 teaspoon ground nutmeg
- 2/3 cup 165ml sunflower oil
- 1 cup 250ml buttermilk
- 2 eggs
- 200 g caster sugar plus extra 2 tbs
- 80 g icing sugar
- 1 teaspoon lemon juice
Instructions
- Preheat oven to 200°C. Grease a 12-hole muffin tray and line with paper cases.
- Sift the flour, soda and spices into a large bowl. In a separate bowl, whisk together the oil, buttermilk, eggs and sugar until combined. Add to the dry ingredients and stir to combine.
- Gently stir in the chocolate chips. Divide the mixture among muffin cases, then bake for 20-25 minutes until lightly browned and a skewer inserted into the centre comes out clean. Cool completely on a wire rack.
- Meanwhile, place the extra 2 tbs sugar in a pan with 2 tbs water and simmer over low heat, stirring, until sugar dissolves. Brush the glaze over the muffins.
- Sift icing sugar into a bowl. Add lemon juice and just enough hot water to make a thick, pipable icing. Use a piping bag or drizzle from a spoon to draw a cross on each muffin, then serve.
Notes
The original recipes calls for currants and cranberries, but being the chocaholic that I am, I just used chocolate chips to make a chocolate chip faux hot cross bun! Feel free to subsitute the chocolate chips with the 135g cranberries plus 150g currants from the original recipe. Pro tip: find out the best way to reheat your hot cross buns here.

Bourke Street Bakery Carrot Cake
A delicious 2-layer carrot cake that is one of the best cakes I’ve ever eaten!
PrintServings: 10
Ingredients
- For the cake:
- 70 g walnuts
- 1 cup 150g self-raising flour
- 1/8 teaspoon baking powder
- 1/8 teaspoon baking soda
- 1/4 teaspoon ground cinnamon
- 1/8 teaspoon ground cloves
- 1/8 teaspoon ground nutmeg
- 1/4 teaspoon salt
- 55 ml about 2 egg whites
- 60 g sugar for egg whites
- 1 egg
- 1 egg yolk
- 160 g sugar for egg yolks
- 170 ml 2/3 cup extra light olive oil
- 125 g carrots peeled, grated
- For the cream cheese frosting:
- 1 tablespoon icing sugar plus extra to dust
- 20 g unsalted butter softened
- 145 g cream cheese preferably Neufchatel
- 2 tablespoons pure thin cream
Instructions
- Preheat the oven to 200C. Grease an 18cm round cake pan and line the base and side with baking paper – the paper should protrude about 2.5cm above the pan.
- Place walnuts on a baking tray and cook for 4-5 minutes until lightly roasted. Cool and cut into thirds.
- Sift flour, baking powder, baking soda, spices and salt into a bowl. Repeat to ensure they are evenly mixed.
- Put the egg whites in a very clean bowl of an electric mixer fitted with a whisk attachment. Beat on high speed until soft peaks start to form. Slowly pour in the sugar for the egg whites, while the motor is still running, being careful not to overmix – the meringue should reach soft peak stage. Quickly transfer the meringue to another bowl and set side until needed.
- Put the egg and egg yolk in the bowl of the electric mixer and add the sugar for the egg yolks. Mix on high speed for 3-4 minutes, until the mixture doubles in volume and is quite airy. With the motor still running, slowly pour in the oil in a thin stream being careful that it doesn’t split or deflate too much.
- Remove the bowl from the mixer and with a spatula, gently fold in the flour mixture until combined. Fold in the carrots and walnuts. Quickly and lightly fold in the meringue – do not fold it through completely, you should still be able to see streaks of meringue through the mix.
- Pour into the prepared pan and bake for 1 hour 10 minutes, or until a skewer inserted into centre of the cake comes out clean. You may need to drop the oven temperature to 180C after the first 30 minutes if the top is browning too quickly.
- Meanwhile, for the cream cheese frosting, cream the icing sugar and butter in the bowl of an electric mixer until pale and smooth. Add the cream cheese in small amounts, allowing it to be completely incorporated before adding the rest. Scrape down the sides of the bowl during this process to ensure even mixing. Add the cream and mix until smooth, being careful not to overmix at this stage or the cream may curdle and separate. If using a different type of cream cheese for this recipe you may need to add a little more cream – the frosting needs to be of a spreadable consistency but not at all runny.
- Remove the cake from the oven and allow to cool in the pan for 30 minutes before turning it out onto a wire rack to cool completely. Using a serrate knife, slice horizontally through the centre of the cake to form 2 even-sized layers and fill with cream cheese frosting. Dust the top of the cake with icing sugar to serve.
Notes
For more recipes from Bourke Street Bakery, check out their beautiful cookbook!

Banana Coconut Cupcakes With Creme Fraiche Frosting And Coconut Caramel Sauce
Banana coconut cupcakes with creme fraiche frosting and drizzled in coconut caramel sauce.
PrintServings: 12 cupcakes
Ingredients
- For the cupcakes:
- 1 cup all-purpose flour
- 1/2 teaspoon baking powder
- 1/2 teaspoon baking soda
- 1/4 teaspoon salt
- 1 stick butter 113g, softened
- 1/2 cup sugar
- 1/4 cup sour cream
- 1 1/2 teaspoons vanilla extract
- 2 large eggs
- 2 large ripe bananas peeled, and mashed
- 1/2 rounded cup sweetened shredded coconut
- 1 fresh banana sliced, for decoration
- For the frosting:
- 250 g creme fraiche
- 1/4 cup confectioners’ sugar
- For the caramel sauce:
- 50 g unsalted butter cut into cubes
- 1/2 cup firmly packed 100g brown sugar
- 3 tablespoons honey
- 150 ml coconut milk or coconut cream
- 1 teaspoon vanilla extract
Instructions
- For the cupcakes: Preheat the oven to 350F (180C). Line 1 (12-cup) muffin pan with paper cupcake liners.
- In a medium bowl, combine the flour, baking powder, baking soda, and salt. Set aside.
- In a large bowl, add the butter and the sugar. Beat with a hand-held mixer until combined. Add the sour cream and the vanilla extract. Slowly beat in the eggs, 1 at a time. Incorporate the dry mixture and wet mixtures together until thoroughly combined. Add the bananas and shredded coconut, being careful not to over mix. Using an ice cream scoop, fill each cupcake liner 3/4 way full. Bake in the preheated oven until the tops turn golden-brown and when a toothpick, inserted in the middle of the cupcake, comes out clean, about 20 minutes. Remove the cupcakes from the oven to a wire rack and let cool before frosting.
- For the frosting:Combine creme fraiche and confectioners sugar in the bowl of an electric mixer. Using the whisk attachment, whisk until thick and creamy, being careful not to overmix or it may become grainy. Use immediately.
- For the caramel sauce: Stir all ingredients in a pan over low heat to dissolve sugar, then simmer for 5 minutes, until thickened. Cool to room temperature before using on cupcakes, otherwise it will melt the frosting.
- Use leftovers for pancakes, pies or ice cream.
- Assembly: Pipe a small mound of creme fraiche frosting on top of each cupcake using a plain round tip, or a Ziploc bag. It doesn’t have to be perfect. Using a small spoon or butter knife, insert the tip into the very top of the frosting and turn in a circular motion while pushing down to make an indentation, or pocket, in the frosting (see photo above). Fill this pocket with cooled coconut caramel sauce. Place a piece of sliced banana firmly, but gently, on top of the pocket of sauce to completely cover it. Drizzle a little bit of the sauce on top of the banana. Serve immediately.
Notes
If not serving immediately, I suggest frosting the cupcakes, and making the indentation beforehand. Store in the refrigerator. When it is time to serve, fill the indentation with the sauce and place the banana on top. Once decorated, the cupcakes are best eaten immediately. You can also use some coconut butter to give the cupcakes more of a coconutty flavor.

Caramel Apple French Toast
French toast with caramelized applies and caramel sauce. A lovely, indulgent breakfast.
PrintServings: 1 -2 servings
Ingredients
- Caramel sauce:
- 2 cups 400 g sugar
- 1 2/3 cups 400 g heavy cream
- 2 tablespoons 30 g salted butter
- 1/4 teaspoon fleur de sel or coarse sea salt or to taste
- French toast:
- 3 eggs
- 1/4 cup milk
- 1-2 teaspoons cinnamon or to your taste
- Dash of nutmeg
- 4 slices thick-sliced gourmet bread or bread of your choice
- unsalted butter to grease pan
- 1/2 Pink Lady apple thinly sliced, peeled if you like
- 1-2 tablespoons caramel sauce recipe above, plus extra to serve
Instructions
- Caramel sauce: Spread the sugar in an even layer in a large metal Dutch oven or casserole, at least 6 quarts (6 L). Set over moderate heat and cook without stirring, until the sugar near the edge just starts to liquefy.
- Using a wooden spoon or heatproof spatula, begin gently stirring, encouraging the melted sugar around the edges toward the center and delicately stirring up any sugar melting on the bottom as well. The sugar will start to look pebbly as it cooks, but keep going; it will melt completely as it turns amber.
- Continue to cook until the sugar turns deep brown and starts to smoke. (Don’t worry about any large chunks of caramel.) The darker you can cook the sugar without burning it, the better the final sauce will taste. It’s ready when it’s the colour of a well-worn centime, or penny, and will smell a bit smoky.
- Remove from heat and quickly stir in about a quarter of the cream. The mixture will bubble up furiously, so you may wish to wear an oven mitt over your stirring hand. Continued to whisk in the cream, stirring as you go to make sure it’s smooth. Stir in the butter and salt. Serve warm. If you like your sauce a bit thinner or less rich, add 1/4 cup (60 ml) water.
- French toast: Prepare egg mixture for the French toast by placing eggs, milk, cinnamon and nutmeg in a bowl. Whisk until smooth. Pour into a shallow dish and set aside.
- Heat a frying pan over low-medium heat. Add about 1-2 teaspoons (just eyeball it) unsalted butter and let it melt. Add sliced apples and 1 tablespoon of the caramel sauce. Stir to melt caramel sauce and coat the apples. Cook the apples until tenter and a little bit transparent. Add 1 teaspoon or more of caramel sauce if the apples are looking dry. When done, remove from the pan and set aside (keep warm, if possible).
- Do not clean the frying pan after cooking the apples – the cooked-on caramel will give a great flavor to at least your first batch of French toast. Keep the pan on the heat and increase the heat a little bit. Add 1-2 teaspoons (again, just eyeball it) of unsalted butter to the pan and let it melt. Coat a slice of bread on both sides in the egg mixture, then place into the frying pan. Cook until golden brown, about 2-3 minutes, then flip the bread over and cook the other side until golden brown. Repeat with the rest of the bread, adding more butter before you add more bread to the pan. You can cook two slices at a time or more, if your pan is big enough. Set aside the cooked slices and keep warm while you cook the rest of the bread.
- I like to add more cinnamon and nutmeg to my egg mixture after coating each slice of bread just to make sure the next slice has the same amount of spice!
- To serve, arrange French toast on a plate. Place caramel apples on top of the toast, then drizzle the whole pile with caramel sauce (not too much though, so it won’t be too rich!). You may need to heat the caramel sauce in the microwave to make it pourable, if it’s been in the refrigerator.
Notes
Storage: The sauce can be made up to one month in advance and kept refrigerated. Rewarm the caramel in a small saucepan over low heat or in a microwave. You can also reheat the french toast according to these instructions. For serving ideas, check out my article on what to serve with French toast.

Pikelets
You can make pikelets with just a handful of staple ingredients and they can be served with a variety of toppings.
PrintIngredients
- 1 cup 150g self-raising flour
- 1 tbs caster sugar
- 3/4 cup 185ml milk
- 1 egg
- Melted butter to brush frypan
Instructions
- Sift flour and sugar together into a bowl with a pinch of salt.
- Whisk milk and egg together, then add to dry ingredients, whisking until smooth.
- Heat a non-stick frypan over medium heat and brush with a little melted butter. Drop level tablespoonfuls of the mixture into the pan and cook for half a minute or until bubbles appear on the surface.
- Turn over and cook other side for 1 minute until golden.
- Allow to cool and serve with toppings of your choice.

Banana Bread With Honeyed Ricotta
Banana bread with honeyed ricotta, the perfect morning tea treat!
PrintServings: 8 slices
Ingredients
- 250 g 1 2/3 cups self-raising flour
- 1 teaspoon bicarbonate of soda baking soda
- 3/4 teaspoon ground cinnamon divided
- 2 large eggs
- 275 g 1 1/4 cups caster sugar
- 125 ml 1/2 cup vegetable oil
- 3 overripe bananas mashed (1 1/2 cups)
- 2 tablespoons Greek-style yogurt
- 1 teaspoon pure vanilla extract
- 150 g 1 1/2 cups walnuts, roasted, halved
- 150 g ricotta
- 180 g 1/2 cup honey, divided
Instructions
- Preheat oven to 150C. Grease and line the base and sides of an 8cm x 11cm x 30cm (6-cup) loaf pan with baking paper. Sift flour, bicarbonate of soda, 1/2 teaspoon cinnamon and 1/4 teaspoon salt into a bowl.
- Using an electric mixer, beat eggs and sugar on high speed until thick and pale. Reduce speed to low-medium and gradually add oil in a thin, steady stream. Add bananas, yogurt and vanilla, and beat until well combined. Add flour mixture and three-quarters of the walnuts and stir until combined. Pour batter into prepared pan and scatter with remaining walnuts. Bake for 1 hour or until a skewer inserted into the center comes out clean.
- Cool for 10 minutes in pan, then turn out onto a wire rack to cool.
- Meanwhile, combine ricotta and 2 tablespoons of the honey in a bowl. Sprinkle with remaining 1/4 teaspoon cinnamon. Place remaining 4 tablespoons honey in a small pan and warm slightly.
- To serve, drizzle banana bread with warm honey. Thickly slice and serve with honeyed ricotta.
Notes

Lamingtons
Classic Australian lamingtons; sponge cake dipped in chocolate and coated in shredded coconut.
PrintServings: 16
Ingredients
- 4 eggs
- 125 g caster sugar
- 125 g plain flour
- 1 teaspoon vanilla bean paste
- 50 g unsalted butter melted
- 200 g shredded coconut
- Chocolate Icing
- 25 g unsalted butter
- 160 ml 2/3 cup milk
- 500 g icing sugar
- 50 g 1/2 cup Dutch cocoa powder
Instructions
- Preheat the oven to 190C. Grease and line the base and sides of a 20cm square cake pan with baking paper. Fill a sink one-third full with water. Place eggs and sugar in the bowl of an electric mixer. Place bowl in sink and whisk for 2 minutes or until mixture is runny and slightly foamy. Remove from sink. Using an electric mixer, whisk on high speed for 4 minutes or until mixture is pale and triples in volume.
- Using a sieve, sift just enough flour to cover the top of the egg mixture. Using a large metal spoon, fold in flour in one light motion. Repeat sifting and folding with remaining flour until just combined.
- Combine vanilla and butter in a bowl, then add a large spoonful of batter and stir to combine. Gently fold the butter mixture into batter until just combined, then spoon into the prepared pan.
- On a work surface, spin the pan to level, then bake for 25 minutes or until centre springs bake when pressed with your fingertip. Cool in pan for 5 minutes, then turn out onto a wire rack to cool completely. Freeze for 20 minutes; this will make the sponge easier to cut.
- To make icing, stir butter and milk in a heatproof bowl over a saucepan of gently simmering water until butter is melted. Sift over sugar and cocoa, then stir until smooth. Turn off heat.
- My note – I didn’t use the double-boiler method as described here to make the icing, I just put the ingredients in a saucepan and had the burner set very, very low.
- Using a large serrated knife, trim sides of sponge, then cut into 16 cubes. Scatter coconut over a tray. Insert a skewer into the crust side of a piece of sponge (don’t go all the way through). Holding the skewer over icing, and, holding a spoon in the other hand, spoon icing over the sponge, rotating the skewer to coat evenly. Shake off excess, then slide sponge off the skewer onto the tray of coconut. Scatter coconut over the top and sides of sponge, then transfer to a tray lined with baking paper. Repeat with remaining sponge cubes, icing and coconut. If the icing starts to thicken, stir in a little water to thin.
Notes
My note – using a skewer was useless! I ended up just dropping the sponge cube into the icing, spooning icing over it, then using a fork to lift it out and sit it on the coconut.

Aaron’s Chilli, Mushroom & Chorizo Pasta
A lovely comfort food-style pasta dish with chillies, mushrooms and chorizo.
PrintServings: 4 servings
Ingredients
- 60 ml 1/4 cup olive oil
- 3 chorizo sausages thinly sliced
- 2 cloves garlic crushed
- 1 red onion finely chopped
- 200 g button mushrooms thickly sliced
- 2 tablespoons roughly chopped oregano
- 2 tablespoons roughly chopped basil plus extra leaves, to serve
- 120 g 1 cup pitted black kalamata olives, halved
- 4 red bird’s-eye chillies seeded, finely chopped
- 2 x 400g cans Italian diced tomatoes
- 400 g long macaroni or other tubular pasta
- 1 1/2 cups wild rocket plus extra leaves to serve
- 25 g 1/3 cup finely grated parmesan, plus extra, to serve
- Extra virgin olive oil to drizzle
Instructions
- Heat 2 tablespoons of the olive oil in a large pan over medium-high heat. Cook chorizo, stirring, for 2 minutes or until browned. Add garlic, onion, mushrooms, oregano, basil and half each of the olives and chillies. Cook, stirring, for 4 minutes or until onion has softened. Stir in tomatoes, bring to a simmer, then cook, stirring occasionally, for 10 minutes or until sauce is slightly thickened. Season with salt and pepper.
- Meanwhile, cook pasta in a large saucepan of boiling salted water until al dente. Drain. Reserve pan.
- Return pasta to pan and toss with remaining 1 tablespoon olive oil. Add the tomato sauce, rocket and parmesan, and toss well to combine.
- Divide pasta among bowls, then top with the remaining olives and chillies. Scatter with extra basil, rocket and parmesan, then drizzle with extra virgin olive oil to serve.
Notes
Do you have leftover sausages or sausage rolls? Check out our article on reheating your leftover sausage rolls for full details.

Chocolate & Peanut Butter Slice
A baked version of the popular no-bake peanut butter bars, with a baked peanut butter base and swirled chocolate-peanut butter topping.
PrintServings: 12 slices
Ingredients
- 125 g unsalted butter
- 1 cup 280g smooth peanut butter, plus 2 tbs extra to drizzle
- 11/2 cups 225g plain flour, sifted
- 3/4 firmly packed cup 165g brown sugar
- 1 cup 90g desiccated coconut
- 1 egg beaten
- 250 g good-quality dark chocolate chopped
- 50 g white chocolate chopped
- 50 g milk chocolate chopped
Instructions
- Preheat the oven to 180°C. Line a 20 x 30cm lamington pan with baking paper, leaving 4cm overhanging on all sides.
- Combine the butter and peanut butter in a saucepan over low heat, stirring, for 1-2 minutes until melted. Place the flour in a large bowl with the sugar, coconut, egg and butter mixture and stir to combine. Press the mixture into the base of the prepared pan and smooth the surface. Bake for 10 minutes until golden (I had to bake for 10 minutes longer). Set aside to cool for 10 minutes.
- Meanwhile, place the dark chocolate in a heatproof bowl set over a pan of gently simmering water (don’t let the bowl touch the water) until the chocolate has melted. Stir until smooth, then pour over the base and chill for 30 minutes until set.
- Melt the white and milk chocolates in separate bowls as above. Whisk the extra 2 tbs peanut butter into the white chocolate until smooth. Drizzle slice with melted milk chocolate, followed by the white chocolate mixture. Chill briefly until set. Using the paper, lift the slice out of the pan and cut into 12 squares.

Mulberry & White Chocolate Cream Tart
Vanilla bean white chocolate pastry cream tart with mulberries.
PrintServings: 1 person
Ingredients
- For the pastry:
- 240 g plain flour
- 160 g butter
- Pinch of salt
- For the pastry cream:
- 1 1/4 cups 300 ml milk
- 1/2 vanilla bean split lengthwise
- 50 grams white chocolate finely chopped
- 3 large egg yolks
- 1/4 cup 50 grams granulated white sugar
- 1/8 cup 20 grams all-purpose flour
- Scant 3 tablespoons 20 grams cornstarch (corn flour)
- 1/2 cup 115 ml heavy cream, softly whipped
Instructions
- For the pastry: Place the flour, butter and a pinch of salt in a food processor and blend until the mixture resembles fine breadcrumbs. Add 1-2 teaspoons cold water and blend again until the dough just comes together. Tip out onto a lightly floured board or clean bench and form dough into a disc, enclose in cling film and refrigerate for 30-60 minutes.
- Roll pastry out to 3-5mm thick, then use to line a 9-inch loose-bottomed tart tin (you’ll probably have to trim the edges). Prick the base with a fork, then place back in the fridge to rest for about 20 minutes.
- Preheat the oven to 180°C. Line the pastry case with baking paper and pastry beads or uncooked rice. Blind-bake for 15 minutes minutes, then remove baking paper and beads and bake for another 5-10 minutes until just golden. Press down any bubbles that have risen up and allow to cool.
- For the pastry cream:
- In a medium-sized stainless steel bowl, mix the sugar and egg yolks together with a wooden spoon. (Never let the mixture sit too long or you will get pieces of egg forming.) Sift the flour and cornstarch together and then add to the egg mixture, mixing until you get a smooth paste. Set aside.
- Meanwhile in a saucepan combine the milk and split vanilla bean on medium heat until boiling. Remove from heat, add white chocolate and whisk until melted. Add milk mixture slowly to egg mixture, whisking constantly to prevent curdling. (If you get a few pieces of egg (curdling) in the mixture, pour through a strainer.) Remove vanilla bean, scrape out seeds, and add the seeds to the egg mixture.
- Place the egg mixture back into a medium saucepan and cook over medium heat until boiling, whisking constantly. When it boils, whisk mixture constantly for another 30 – 60 seconds until it becomes very thick and it is hard to stir.
- Remove from heat. Pour through a strainer into a clean bowl and immediately cover the surface with plastic wrap to prevent a crust from forming. Cool. Just before using in the tart shell, fold in the whipped cream with a wooden spoon. Pour into tart shell and refrigerate at least 4 hours or overnight for best results.
- Assembly: Just before serving, arrange mulberries (or fresh berries of your choice) on top of cream, which should now be relatively firm. Melt 4 or 5 squares of white chocolate and drizzle it on top of the tart. Serve chilled.

Chicken Yakitori With Cucumber Salad
Chicken yakitori skewers with cucumber salad; quick and easy and perfect for weeknight dinners.
PrintServings: 4 servings
Ingredients
- Ingredients
- 1/4 cup 60ml soy sauce
- 2 tablespoons mirin
- 2 tablespoons maple syrup
- 4 160 g chicken thigh fillets trimmed and chopped
- 3 green onions scallions, chopped in 3cm lengths
- wasabi to serve
- Bamboo skewers soaked in water for 20 minutes
- Cucumber Salad:
- 1/4 cup 60ml rice wine vinegar
- 2 tablespoons vegetable oil
- 2 teaspoons sesame oil
- 1 tablespoon miron
- 2 Lebanese cucumbers sliced
Instructions
- Place the soy sauce, mirin and maple syrup in a bowl and stir to combine. Add the chicken and green onion and toss to coat. Cover and set aside for 5 minutes to marinate.
- To make the cucumber salad, place the vinegar, vegetable and sesame oil, mirin and cucumber in a bowl and mix to combine. Set aside.
- Thread the chicken and green onion onto skewers, reserving the marinade. Heat a char-grill pan or barbecue over high heat and char-grill or barbecue the skewers for 3 minutes each side or until cooked through. Place the reserved marinade in a small saucepan over high heat and cook for 2 minutes or until heated through and thickened slightly. Serve the chicken with the cucumber salad, yakitori marinade and wasabi.
Notes
Pro tip: make sure you store your raw chicken correctly after opening. Full details in the linked article. Need inspiration for what to serve with your Yakitori skewers? We’ve got you covered!

Peanut Butter Chocolate Chip Blondies
One of the most popular recipes on my blog, these peanut butter chocolate chip blondies are sure to satisfy!
PrintServings: 16 squares
Ingredients
- 1/2 stick unsalted butter
- 1 cup brown sugar
- 1/4 cup natural peanut butter
- 1 egg
- 1/2 teaspoon vanilla extract
- 1 1/4 cups all purpose flour
- 1/2 teaspoon baking powder
- 1/8 teaspoon baking soda
- 1/4 teaspoon salt
- 1/4 cup milk or semi-sweet chocolate chips I probably used closer to 1/2 cup!
Instructions
- Preheat the oven to 350°F. Grease an 8×8″ square pan and set aside.
- In a saucepan over medium heat, melt the butter and brown sugar, stirring constantly until smooth. Remove from the heat, and stir in the peanut butter. Allow to cool.
- Meanwhile, combine the flour, baking powder, baking soda and salt in a large mixing bowl.
- Add the egg to the butter & sugar mixture and mix well. Add the vanilla extract and stir to combine. Pour the mixture into the prepared dry ingredients, and stir to create a thick, smooth batter. Fold in half the chocolate chips, reserving the rest for sprinkling on top.
- Transfer the batter to the prepared pan, spreading the batter evenly to the edges of the pan. Sprinkle with the chocolate chips and lightly press them into the batter.
- Bake for 25 minutes until the top is golden and the edges are slightly browned. Allow to cool in the pan. Cut into squares and serve.

Quadruple Chocolate Pistachio Cupcakes
Chocolate cupcakes with a milk chocolate-pistachio truffle filling and frosted with chocolate-olive oil mousse.
Print PinServings: 14 -16 cupcakes
Calories: 400kcal
Ingredients
For the cupcakes
- 1/4 cup + 2 tablespoons unsweetened Dutch-process cocoa powder
- 1/4 cup + 2 tablespoons cup hot water
- 1 1/4 cups all-purpose flour
- 1/4 cup finely ground pistachios
- 1/2 teaspoon baking soda
- 1/2 teaspoon baking powder
- 1/2 teaspoon + a pinch salt
- 1 1/2 sticks unsalted butter
- 1 cup + 2 tablespoons sugar
- 2 large eggs room temperature
- 1/2 tablespoon 1/2 teaspoon pure vanilla extract
- 1/2 cup sour cream room temperature
For the truffles
- 100 g best quality milk chocolate chopped
- 35 ml double cream
- 1/4 teaspoon pure vanilla extract
- about 20g chopped pistachios
For the frosting
- 100 g dark chocolate 50% cocoa, chopped
- 50 g dark chocolate 70% cocoa, chopped
- 100 ml extra virgin olive oil
- 1 cup 250ml thickened cream, chilled
- chopped pistachios and finely ground pistachios to sprinkle
Instructions
For the cupcakes
- Preheat oven to 350 degrees. Line standard muffin tins with paper liners.
- Whisk together cocoa and hot water until smooth. In another bowl, whisk together flour, pistachios, baking soda, baking powder, and salt.
- Melt butter with sugar in a saucepan over medium-low heat, stirring to combine.
- Remove from heat, and pour into a mixing bowl. With an electric mixer on medium-low speed, beat until mixture is cooled, 4 to 5 minutes.
- Add eggs, one at a time, beating until each is incorporated, scraping down sides of bowl as needed.
- Add vanilla, then cocoa mixture, and beat until combined.
- Reduce speed to low. Add flour mixture in two batches, alternating with the sour cream, and beating until just combined after each.
- Divide batter evenly among lined cups, filling each three- quarters full.
- Bake, rotating tins halfway through, until a cake tester inserted in centers comes out clean, about 20 minutes. Transfer tins to wire racks to cool 15 minutes; turn out cupcakes onto racks and let cool completely.
- Using the cone method, cut out a hole in the center of the cupcakes then stuff in a truffle. Cover the truffle with a trimmed part of the cupcake you cut out, if desired.
- Frost cupcakes with chocolate olive oil mousse, then sprinkle with chopped pistachios.
For the truffles
- Melt the chocolate and cream together in a glass bowl set over a small pan of simmering water.
- Stir in the vanilla, then pour into a small bowl. Once cool, put in the fridge to chill for 2-3 hours.
- When firm, use a melon baller or 2 teaspoons to scoop out and form balls, then roll each truffle in the chopped pistachios.
For the frosting
- Place chocolate in a heatproof bowl over a pan of gently simmering water (don’t let the bowl touch the water) and stir until melted.
- Stir in the olive oil, then remove from heat to cool for 5 minutes.
- Meanwhile, in a chilled bowl using chilled beaters, whip the cream to soft peaks (I used Katie, my KitchenAid mixer to do this!).
- Gently fold the whipped cream into the chocolate mixture until combined.
- Spoon into a piping bag fitted with the tip of your choice and pipe onto cupcakes.
- Sprinkle with pistachios.
Nutrition
Serving: 1cupcake | Calories: 400kcal

Ingredients
- 4 teaspoons instant coffee
- 2 cups hot not boiling water
- 1 cup thickened cream
- 250 g mascarpone cheese
- 1/2 cup caster sugar
- 4 tablespoons Tia Maria optional, in this cae
- 20 sponge fingers
- Cocoa powder for sprinkling
Instructions
- Combine instant coffee and hot water in a bowl that is wide enough to dip the sponge fingers into; stir to dissolve coffee. Place in refrigerator to cool completely. It doesn’t need to be chilled, just near room temp is fine.
- While coffee is cooling, whip thickened cream to stiff peaks, be careful not to overbeat. In a separate bowl, combine mascarpone cheese, caster sugar and Tia Maria, if using. If you’re not using Tia Maria, take out 4 tablespoons from your brewed coffee and use it instead. Stir mixture until smooth and creamy (the sugar made it a little grainy for me, but it will eventually dissolve on its own, I discovered).
- Gently fold the mascarpone mixture into the whipped cream and set aside.
- Remove coffee from the refrigerator and dip the sponge fingers in it, one by one, for about 4-5 seconds each. Immediately place the fingers into an 8×8-inch square baking dish to form one single layer (break some in half if you need to). Spread half of the mascarpone mixture evenly on top. Dip remaining sponge fingers, as above, to form one more single layer, then spread remaining mascarpone mixture on top. Dust the top with sifted cocoa powder. Refrigerate for about 3 hours to firm up, then slice and serve cold.
Notes
It has been noted that this recipe is not exactly egg-free. What I specifically mean is that this recipe does not contain the traditional raw eggs in the cream layers. While I didn’t look at the ingredients for the sponge fingers, it can be presumed that they did contain cooked eggs.

Tim Tam Truffle Pops
No-bake truffles made with Tim Tams instead of Oreos – an Australian twist on an American favorite!
PrintServings: 10 -12 truffles
Ingredients
- 1 200 g package of Tim Tams
- 80 g cream cheese at room temperature
- 150 g chocolate coarsely chopped
Instructions
- Place the Tim Tams in a food processor and process until they become fine crumbs. Add the cream cheese and pulse until the mixture is smooth and starts to form a ball.
- If you don’t have a food processor, you can place a few of the Tim Tams at a time in a blender instead (or you could try bashing them in a large Ziploc bag with a rolling pin!). Tip the crumbs out into a bowl and mix the cream cheese in with your hands.
- Shape the mixture into balls and smooth them by rolling in the palms of your hands. Each of my truffles weighed 25g. Place the truffles into the refrigerator for 20-30 minutes to firm them up; this makes them easier to work with.
- Melt the chocolate in a heavy-based saucepan over low heat, stirring often (or use your preferred method of melting chocolate). Remove from heat when only little bits of chocolate remain, and stir until those bits are melted. Take the lollipop sticks, dip the ends into the melted chocolate and stick the chocolate-coated end halfway into each truffle. Place them back in the refrigerator again to firm up the chocolate, about 5 minutes.
- Remove from the refrigerator and begin the dipping process! Lay a sheet of baking paper on a plate, tray or cutting board. Holding on to the stick, slowly and carefully lower each truffle into the melted chocolate and coat entirely. Try not to swirl the truffle around, in case the truffle isn’t totally secured onto the stick – just dip straight in and out. Let the excess drip off, then place the truffle, stick side up of course, onto the baking paper, pushing down gently to make sure it stays upright.
- When finished, place them back in the refrigerator (this is why I mentioned to have the baking paper on a plate, tray or cutting board!) to set the chocolate.
- If you want to double-dip for a thicker chocolate coating that has a little bit more crunch, melt another 100g or so of chocolate, remove the pops from the refrigerator after about 20 minutes, and dip them again in chocolate that is at room temperature – not hot. Place back in the refrigerator to set. Be sure that the chocolate coating is entirely set if you want to stick them into bags.

Chocolate Pots With Salted Caramel Toffee
Boozy, dark chocolate pots with whipped cream and shards of salted caramel toffee.
PrintIngredients
- 250 g good-quality dark chocolate finely chopped
- 200 ml thickened cream plus extra whipped cream to serve
- 2 tablespoons caster sugar
- 2 egg yolks lightly beaten
- 1 tablespoon brandy or 1 teaspoon pure vanilla extract
- 20 g salted butter softened
- For the salted caramel toffee
- 1 cup 220g caster sugar
- 1 tablespoon sea salt flakes
Instructions
- Place the chocolate in a heatproof bowl and set aside.
- Heat cream and sugar in a pan over low heat, stirring to dissolve the sugar. Bring to just below the boiling point, then remove from heat and pour over the chocolate, stirring until completely melted and smooth. If the chocolate doesn’t melt entirely, you may place the bowl in the microwave for 15-20 second intervals, stirring very well after each, until the chocolate is melted and the mixture is smooth.
- Gently stir in the egg yolks and brandy or vanilla extract, then add butter and stir to combine.
- Divide chocolate mixture between four 200ml dessert moulds or pots, then chill for at least 2 hours or overnight until just set.
- Meanwhile, for salted caramel toffee, line a baking tray with a sheet of foil. Place sugar and 1/4 cup (60 ml) water in a pan over low heat, stirring to dissolve the sugar. Increase the heat to high and cook, swirling pan occasionally and brushing down sides with a damp pastry brush, for 4-5 minutes or until a light golden caramel. Quickly, but carefully, pour onto prepared tray, swirling and tilting to spread the caramel. Sprinkle over salt. Cool completely until hardened, then break into shards. Toffee can be prepared up to a day ahead and kept in an airtight container.
- To serve, top chocolate pots with whipped cream and sprinkle over shards of salted caramel toffee.
Notes
Need to reheat your cake? Check out my full guide on reheating chocolate lava cakes and fondants here.

Zoku Quick Pop Maker Recipes
A quick and easy recipe for dulce de leche Vietnamese coffee popsicles.
PrintServings: 5
Ingredients
- 1 cup extra strong coffee or espresso hot, but not boiling
- 1/3 cup dulce de leche
Instructions
- Scoop the dulce de leche into the coffee and stir until thoroughly combined and all the dulce de leche is melted. Taste the mixture to make sure it is to your liking. Place in the refrigerator to cool completely.
- Pour into molds, as per the instructions for the Zoku, and wait up to 10 minutes to freeze (or just simply pour into plain old popsicle molds and freeze overnight).

Ingredients
- For the cherry popsicles:
- 6 ounces fresh pitted cherries*
- 1/2 cup Greek vanilla yogurt
- 1/2 cup whole milk
- 1 tablespoon granulated white sugar
- For the quick shell:
- 2/3 cup 4 oz semisweet chocolate chips
- 1/3 cup 2 1/2 oz refined coconut oil
Instructions
- For the quick shell:
In a double boiler over barely simmering water, whisk together the chocolate and coconut oil until the chocolate has completely melted. Remove from heat and let cool completely before applying to pops. Yields 3/4 cup of Quick Shell. - For the cherry popsicles:
In a blender, combine cherries, yogurt, milk, and sugar. Blend until throughly combined and smooth. - Pour into the Zoku base as per instructions, or if using a traditional popsicle mold, pour in and allow to freeze overnight.
- Adding the quick shell:
Hold a popsicle, flat side facing up, and use a small spoon to drizzle the quick shell onto the pops. Wait a few seconds for the shell to harden and do the same to the other side.
Notes
*I used frozen cherries that had been defrosted slightly.

Ingredients
- For the cupcakes:
- 1 cup coconut milk
- 1/3 cup canola oil
- 1 teaspoon vanilla extract
- 3/4 cup sugar
- 1 cup all-purpose flour
- 2 tablespoons almond meal
- 1/3 cup cocoa powder
- 3/4 teaspoon baking soda
- 1/2 teaspoon baking powder
- 1/4 teaspoon salt
- For the frosting:
- 6 ounces 1 1/2 sticks unsalted butter, softened
- 8 ounces confectioners’ sugar sifted
- 1/4 teaspoon pure vanilla extract
- green food coloring – paste gel, powder or liquid is fine
Instructions
- For the cupcakes: Preheat oven to 350 degrees. Line a 12-cup muffin pan with paper liners.
- In the bowl of an electric mixer, whisk together, by hand, the coconut milk, sugar, oil, and vanilla extract. In a separate bowl, sift together the flour, almond meal, cocoa powder, baking soda, baking powder, and salt. With the mixer on low-speed, slowly add the dry ingredients to the coconut milk mixture until it is uniform and smooth (do not overmix).
- Pour batter in liners, filling cups no more than 2/3 full (3 tablespoons of batter). Bake 18-20 inutes, or until cake tester comes out clean. Transfer to a cooling rack to cool completely.
- For the frosting: Beat butter with a mixer on medium-high speed until pale and creamy, about 2 minutes.
- Reduce speed to medium. Add sugar, 1/2 cup at a time, beating after each addition, about 5 minutes. (After every 2 additions, increase speed to high, and beat for 10 seconds, then reduce speed to medium-high). Add vanilla and enough food coloring to turn the frosting a bright pastel green, and beat until buttercream is smooth.
Notes
Use M&M’s or Smarties to decorate around the outside of the cupcake to make UFO lights. For the “alien” inside the UFO, use a green lollipop and just place the stick down into the cupcake (trim stick with the scissors if necessary). To make the UFO dome, use small plastic shot glasses. Be sure to use silver foil cupcake liners to make the cupcakes look like shiny little UFOs!

Vegetable Sushi With Wasabi Mayonnaise
Making your own sushi isn’t as difficult as you might think! Try this recipe for vegetable sushi and you’ll quickly get the hang of how to do it!
PrintServings: 3 -6 servings
Ingredients
- 1 cup of sushi rice uncooked
- 3 tablespoons rice wine vinegar
- 1 carrot
- 1 Lebanese cucumber
- 1 avocado
- 3 tablespoons whole egg mayonnaise
- 3 teaspoons wasabi or depending on your taste
- 3 squares of nori seaweed
- a cup of plain water
- soy sauce to serve
Instructions
- Rinse the sushi rice under running water until the water runs clear. Prepare the rice according to package instructions. While rice is cooking, cut carrot and cucumber into julienne slices (slice around the mushy center of the cucumber, as you don’t want to use this part in the sushi) – this is easiest with a mandolin and julienne attachment – and cut the avocado into slices.
- To make the wasabi mayonnaise, mix the mayonnaise and wasabi together, using more or less of both ingredients to suit your tastes. You may even choose to leave the wasabi out, or leave the mayonnaise out, or just simply not use either one.
- When rice is ready, fluff it up with a fork, and spread it out onto a non-metallic tray into a thin layer. Sprinkle over the rice wine vinegar and stir the rice around to mix it thoroughly. Spread it out into a thin layer again and cool quickly by fanning it with a notebook, a piece of heavy cardboard, or whatever you have lying around.
- Place a square of seaweed onto a bamboo sushi mat. Take about 1/2 cup of the rice and place it onto the seaweed. Use the back of a spoon to spread it into a thin layer on the seaweed. Leave a 2cm border on the edge of the seaweed that is furthest from you. Spread about 1 tablespoon of wasabi mayonnaise towards the horizontal edge of the rice that is closest to you. Place about 4 lengths of carrot and cucumber and about 3 slices of avocado on top of the wasabi mayonnaise.
- Using the bamboo mat, start to roll the sushi up from the edge that is closest to you. Stop rolling just before you get to the 2cm border at the other edge. Dip a finger into the cup of water and spread some water along the seaweed. Finish rolling the sushi.
- Repeat for remaining seaweed, rice and vegetables.
- Refrigerate the rolls for about 30 minutes. Dip a sharp, serrated knife into a tall cup of water, or stick it under some running water, then slice the rolls however you like. Always be sure to dip the knife in the water before each cut as this will help to slice it easier. Serve the sushi with soy sauce and store leftovers in the refrigerator promptly.
Notes
Refer to blog post for more detailed information and pictures on the process of making this recipe.

Matcha Latte Strawberry Popsicles
Matcha and strawberries taste wonderful together in this popsicle recipe that is perfect for summer!
PrintServings: 6 people
Ingredients
- For the matcha layer:
- 1 1/2 tablespoons fresh matcha it should be bright green, sifted
- 1/2 to 1 teaspoon warm water
- 1 1/3 cup 2% milk
- 1/4 cup caster sugar
- 1/3 cup heavy cream
- For the strawberry layer:
- 8 1/2 ounces hulled quartered strawberries
- 3 1/2 tablespoons whole milk
- 1/4 cup + 1 tablespoon heavy cream
- 3 tablespoons caster sugar
- 1 tablespoon pure vanilla extract
Instructions
- For the matcha layer:
Combine sifted matcha and warm water in a small bowl and stir until it forms a smooth paste. You may need more warm water. Set aside. - Heat the milk in a small saucepan over low heat (do not boil). Whisk in the matcha paste (you don’t have to add all the paste if you feel the matcha flavor is strong enough and the color is green enough) and the sugar. You’ll probably notice little lumps of undissolved matcha – that’s okay, mine didn’t dissolve fully either. Remove from heat and let cool about 10 minutes. Stir in the heavy cream. Place in the refrigerator until completely cool, stirring every so often.
- For the strawberry layer:
Puree strawberries and milk in a blender until completely smooth. Strain the mixture through a fine sieve to remove the strawberry seeds – you’ll need to use a spoon to help push the mixture through the sieve. Whisk in the cream, sugar and vanilla until incorporated and the sugar has dissolved. - Assembly:
Freeze in alternate layers in your Zoku Quick Pop Maker (refer to freezing instructions that came with your Zoku if unsure), letting each layer freeze completely before adding the next layer. Or, fill molds with matcha latte layer, freeze for 30 seconds-2 minutes, depending on how thin or thick you want the outer layer to be. Stick a straw into the unfrozen liquid in the middle and suck it out. Fill the empty matcha shells with the strawberry layer and let freeze completely. Remove popsicles according to the Zoku instructions.

Kid-Friendly Tuna Pasta Salad
A quick and easy fresh pasta salad perfect for kids, lunchboxes, picnics and side dishes.
PrintServings: 4 -6
Ingredients
- 200 g mini spiral pasta or other fun-shaped pasta
- 2 tablespoons whole-egg mayonnaise
- 1/2 tablespoon lemon juice
- sea salt and cracked black pepper
- 1 125 g can tuna drained (we buy no-drain tuna)
- 125 g cherry tomatoes quartered
- 1 small cucumber sliced and halved
Instructions
- Cook the pasta in salted boiling water, according to package instructions. Drain and allow to cool.
- Whisk together the mayonnaise, lemon juice and seasonings in a small bowl until combined.
- Place pasta, tuna, tomatoes, cucumber and mayonnaise mixture in a large bowl and toss/stir gently to coat.
Notes
Got leftovers? Great – don’t forget to store and reheat them properly. Here’s a guide on reheating pasta carbonara (and other types, including pasta ‘salads’ too!). Looking for inspiration on what to serve with this salad? Worry no more. Here’s our guide on what to serve with Caesar salads (but these options all work well for pasta salads like this one!).

Raw Peanut Butter Cookies
A quick and easy recipe for healthy peanut butter cookies that is suitable for vegans, vegetarians, gluten/sugar-free and anyone looking to eat healthy.
PrintServings: 20 cookies
Ingredients
- 1 cup raw or dry-roasted, whole almonds (or almond meal)
- 1 cup pitted medjool dates
- 1/2 cup natural peanut butter or other nut butter
- 1 1/2 teaspoons pure vanilla extract
Instructions
- If you’re using whole almonds, process them until they resemble a coarse meal.
- Add the dates, peanut butter and vanilla; if you’re using already-prepared almond meal, just toss all the ingredients into the food processor together. If the nut butter isn’t salted, you may add a few pinches of salt.
- Process the ingredients until the mixture starts to form a dough, about 2 minutes. If it doesn’t seem to come together, add another tablespoon or two of peanut butter and process again.
- Form the dough into walnut-sized balls and place on a sheet of parchment paper. Press each ball gently with a fork to make the classic peanut butter cookie criss-cross pattern.
- Store in the refrigerator.

Chewy Chocolate Chip Cookies
These chocolate chip cookies use cornstarch as a secret ingredient to make them chewy and thick; perhaps one of the best chocolate chip cookie recipes in existence!
PrintIngredients
- 3/4 cup 170g unsalted butter, softened
- 3/4 cup brown sugar
- 1/4 cup granulated sugar
- 1 egg
- 2 teaspoons vanilla extract
- 2 cups all purpose flour
- 2 teaspoons cornstarch
- 1 teaspoon baking soda
- 1/2 teaspoon salt
- 1 cup bittersweet chocolate chips
Instructions
- Preheat oven to 350F (180C). Line baking sheets with baking paper.
- Place flour, cornstarch, baking soda and salt in a medium bowl and whisk to combine. Set aside.
- In the bowl of a stand mixer fitted with a paddle attachment, cream together butter and sugars until fluffy and light in color. Add egg and vanilla and blend in.
- Mix in flour mixture on low speed. Stir in chocolate chunks.
- Using a standard-sized cookie scoop or tablespoon, drop dough onto prepared baking sheets. Bake for 8-10 minutes, until barely golden brown around the edges. The tops of the cookies shouldn’t brown; it is imperative that you do not baking the cookies any longer than 10 minutes.
- Let cool, on the baking sheets, on a wire rack for five minutes. Remove from baking sheet and let cool completely.
Notes
Got some leftover cookies? Don’t eat them cold! Check out my ultimate guides on reheating cookies and softening stale cookies to bring them back to their former glory.

Ingredients
- 3 cups cubed frozen watermelon
- 1 cup cold milk
- 1/2 teaspoon pure vanilla extract or vanilla bean paste
- 2 tablespoons honey or sugar to taste (you may not need any if your watermelon is nice and sweet)
Instructions
Freezing the watermelon
- Place 1-inch cubes of watermelon on a baking tray lined with baking paper.
- Freeze for 1 hour for a thin consistency milkshake, or up to 2 hours for a thicker consistency.
To make the milkshake
- Place all ingredients in a blender and blend until smooth.

Ingredients
- 1 1/2 cups whole grain spelt flour
- 1 teaspoon baking soda
- 1 teaspoon sea salt
- 3/4 cup natural peanut butter
- 1/4 cup hulled tahini
- 1/3 cup pure maple syrup
- 1/4 cup coconut oil melted and cooled slightly
- 1 1/2 teaspoon pure vanilla extract
Instructions
- Preheat oven to 180C (350F). Line baking tray with parchment paper.
- Mix spelt flour, baking soda and sea salt in a large bowl.
- In a separate bowl combine peanut butter, tahini, maple syrup, coconut oil and vanilla.
- Pour the peanut butter mixture over the flour mixture and fold to combine.
- Drop small rounded balls of dough (each of my dough balls were 15g-17g, or about a rounded 1/2 tablespoon) onto prepared baking tray.
- Press down on each one gently with the back of a fork.
- Bake for 10 minutes only (do not over-bake); the cookies will still be slightly soft but will harden as they cool.
- Let cool for 15 minutes.
Notes
Preparation time does not include the time it would take to make your own peanut butter, as I did! You can replace the tahini with more peanut butter, if desired.

Cookie Dough Greek Yoghurt
A quick and healthier version of cookie dough to satisfy your sweet cravings!
Print PinServings: 1 person
Ingredients
- 1 small container 6 oz, or 170g of plain Greek yogurt
- 1 tablespoon peanut butter
- 1 tablespoon maple syrup or other liquid sweetener
- 1/4 teaspoon pure vanilla extract or vanilla bean paste
- pinch of sea salt optional
- 1 tablespoon mini chocolate chips
Instructions
- Combine the Greek yoghurt with peanut butter, maple syrup, vanilla and salt. Mix until smooth and completely incorporated. Mix in chocolate chips. Enjoy!
Notes
If you’re able to find vanilla Greek yoghurt, you can just add 1 tablespoon of peanut butter, a pinch of sea salt (optional) and 1 tablespoon of mini chocolate chips. Or try The Skinny Fork’s recipe; she even uses Nutella!

Greek Yoghurt Chocolate Puddings
This is a truly decadent and warming self-saucing chocolate pudding, lightened up with the addition of Greek yoghurt.
PrintServings: 6
Ingredients
- 1 cup plain flour
- 4 tbsp cocoa powder divided
- 75 g dark chocolate finely chopped, plus extra, to serve
- 1 1/2 tsp baking powder
- 3/4 cup caster sugar
- 1/2 cup Greek yoghurt room temp, plus extra, to serve
- 2 tbsp butter melted and slightly cooled
- 1 egg room temp
- 1/3 cup brown sugar
Instructions
- Preheat the oven to 180°C. Mix the flour, 3 tbsp of the cocoa powder, chopped chocolate, baking powder and caster sugar together in a large bowl. Stir the yoghurt, butter and egg together in a jug and then stir this mixture into the dry ingredients. Spoon into 6 smallish ramekins or ovenproof dishes.
- Place the brown sugar and remaining tbsp of cocoa powder in a measuring jug and gradually stir in 250ml boiling water. Stir until the sugar has dissolved. Pour carefully and evenly over the six puddings and bake for 20-25 minutes, until firm to the touch.
- Top with extra chopped chocolate and serve immediately with extra yoghurt on the side.

White Chocolate And Hazelnut Panna Cotta
A quick and light dessert featuring white chocolate and chunky Nutella, perfect for dinner guests or as a simple indulgence.
PrintServings: 4 people
Ingredients
- 1/2 cup thickened cream
- 1/2 cup milk
- 1 1/2 tablespoons caster sugar
- 25 g white chocolate finely chopped
- 1 teaspoon powdered gelatine
- 2-3 tablespoons dry-roasted hazelnuts chopped
- 1/3 cup chocolate hazelnut spread see note
- 25 g white chocolate shaved
Instructions
- Place cream, milk and sugar in a small saucepan over medium-low heat. Cook, stirring, for 4 to 5 minutes or until almost simmering (do not boil). Remove from heat. Add 25g finely chopped white chocolate. Stir until chocolate is melted and mixture is smooth. Pour mixture into a heatproof bowl. Sprinkle over gelatine. Whisk to dissolve gelatine. Cool for 10 minutes.
- Meanwhile, stir chopped hazelnuts (add more or less depending on how chunky you’d like it) through chocolate hazelnut spread. Spread 1 tablespoon of spread onto the bottom of 4 100ml-capacity serving bowls. Smooth top.
- Carefully pour cream mixture, over the back of a metal teaspoon, into each glass. Cover with plastic wrap. Refrigerate for 4 hours or until set.
- Remove from refrigerator 10 minutes before serving. Decorate with remaining 25g shaved white chocolate. Serve immediately.
Notes
You may find it easier to layer the chocolate hazelnut spread if it is melted. Heat the spread in the microwave until it is melted (do not allow it to get too hot or boil), then spoon it carefully into the bowls and spread it evenly. Tap the bowls on the counter-top to help even it out and eliminate air bubbles. Allow an extra 10 minutes cook time for cooling, and an extra 4 hours for the panna cotta to set.

Date-Sweetened Quinoa Chocolate Chip Cookies
Delicious and healthy chocolate chip cookies, sweetened only with fresh dates and made gluten-free by using quinoa flour. A perfect alternative to the real thing!
PrintServings: 13 cookies
Ingredients
- 1 cup quinoa flour see notes
- 1/2 t baking soda
- 1 1/2 t cornstarch see notes
- 1/4 t salt
- 1 cup fresh medjool dates about 14, pitted and pureed
- 1/4 cup coconut oil melted and cooled slightly (if solid)
- 1 egg
- 1 t vanilla extract
- 3/4 cup dark chocolate chips
Instructions
- Preheat oven to 180C (350F).
- In a small bowl, stir together the flour, baking soda, cornstarch, and salt. Set aside.
- In the bowl of a stand mixer with paddle attachment, beat the dates and coconut oil together on medium speed until light and fluffy. Add the vanilla and egg, and beat on low-medium speed until combined. Add the flour mixture, and beat on low speed until fully incorporated. Stir in the chocolate chips.
- Chill the dough for about 20 minutes (or up to 2 days) in the refrigerator.
- My note: I skipped this step because it’s winter here and my house is cold, so the dough was firm enough).
- Measure out a rounded tablespoon of dough (I weighed each ball of dough to about 35g) and form the dough into 13 balls. Place on a baking sheet, and flatten slightly with the palm of your hand.
- Bake for 10-12 minutes (a few minutes longer if you like a crispier cookie), until golden and dry to the touch. Allow to cool for about 10 minutes on the cookie sheet before removing to a wire rack to cool. Store in an airtight container.
Notes
I made my own quinoa flour by placing in my Magimix for about 5 minutes. It was still quite coarse, which gave the cookies a crunchy texture. If you prefer a smoother texture, like a normal cookie, you could buy quinoa flour.
For completely gluten-free cookies, make sure your cornstarch is gluten-free.
For completely gluten-free cookies, make sure your cornstarch is gluten-free.

Avocado Ice Cream
Light and refreshing avocado ice cream! With only 5 ingredients and no cooking involved, it’s perfect for a summer dessert.
PrintServings: 6 people
Ingredients
- Flesh of 4 avocados
- Juice of 2 limes
- 200 g caster sugar
- 300 ml thickened cream
- 1 teaspoon pure vanilla extract
Instructions
- Process avocado and lime juice in a food processor into a perfectly smooth puree.
- Beat the sugar and cream with an electric mixer to combine. Add avocado puree and vanilla, then whisk until combined, or just until sugar is dissolved. Do not overmix, though, or you’ll ruin the mixture.
- Churn mixture in an ice cream maker according to manufacturer’s instructions. Transfer to a container and freeze for 4 hours or until firm.
- Alternatively, pour into a shallow container and freeze for 2 hours or until frozen at the edges. Remove and beat with electric mixer. Return to container and refreeze. Repeat this process 2 or 3 times.

Cauliflower Steaks With Olive & Herb Salsa
Bring some healthiness to your dinner table with these nutrition-packed cauliflower steaks.
PrintServings: 4 people
Ingredients
- 2 tablespoons olive oil
- 1 large about 1.2kg cauliflower, cut crossways into four 1.5cm-thick pieces
- 50 g 1/4 cup pimento-stuffed green olives, finely chopped
- 60 ml 1/4 cup extra virgin olive oil
- 1 tablespoon lemon juice
- 1 tablespoon baby capers
- 1 tablespoon chopped fresh continental parsley
- 2 teaspoons chopped fresh oregano
- 1/4 teaspoon caster sugar
Instructions
- Preheat oven to 180C. Line 2 baking trays with baking paper. Heat 2 teaspoons of the olive oil in a non-stick frying pan over medium-high heat. Add 1 cauliflower piece to the pan. Cook, turning, for 4-5 minutes or until golden. Transfer to prepared trays. Season with freshly ground salt and pepper. Repeat with the remaining olive oil and cauliflower pieces. Roast cauliflower for 12-15 minutes or until tender.
- Meanwhile, combine the olives, extra virgin olive oil, lemon juice, capers, parsley, oregano and sugar in a small bowl. Season with freshly ground salt and pepper.
- Transfer the cauliflower to a serving dish. Top with the olive mixture.

Chocolate & Peanut Butter Rice Krispies Treats
A healthier version of chocolate-topped peanut butter Rice Krispies treats made without any marshmallows at all.
PrintServings: 16 people
Ingredients
- 3 cups puffed rice cereal
- 1/2 cup natural peanut butter
- Pinch salt
- 1/2 cup rice malt syrup honey or agave will also work, but will lend a different flavor
- 1 teaspoon pure vanilla extract
- 250 g milk semisweet or dark chocolate (your choice, or a mix!), chopped
- 1 tablespoon natural peanut butter
Instructions
- Grease and line an 8×8-inch baking tin.
- Place cereal in a large bowl and set aside. In a small saucepan, combine peanut butter, salt, rice malt syrup and vanilla. Heat gently and stir until thoroughly combined and melted.
- Pour the peanut butter mixture over the cereal and stir until all the cereal is coated.
- Transfer the peanut butter cereal to the prepared tin and spread out evenly. Place a piece of parchment paper on top of the cereal and use another pan, or your hands, to flatten the top.
- Place the tin in the refrigerator to set for around 30 minutes.
- Near the end of the 30 minutes, place the chopped chocolate and 1tbsp peanut butter in a heatproof bowl set over a pan of gently simmering water (water should be about 1-inch high and the bowl should not touch the water), ensuring no water comes in contact with the chocolate mixture. Stir occasionally until melted and smooth.
- Take the peanut butter cereal from the refrigerator, pour the melted chocolate on top and smooth the surface. Return to the refrigerator for another 30 minutes or until chocolate is set.
- Cut into squares with a sharp knife, cleaning the knife after each cut.
- Store in an air-tight container in the refrigerator; let them warm up to room temperature to soften up the chocolate before serving, if desired.

No-Bake Blueberry Cheesecake
A quick and easy crowd-pleasing blueberry cheesecake recipe that looks beautiful and tastes delicious!
PrintServings: 6 people
Ingredients
- CRUST:
- 2 cups graham cracker crumbs
- 3 tablespoons melted butter
- 2 tablespoons brown sugar
- FILLING:
- 12 oz 340g mascarpone, softened
- 4 oz 115g cream cheese, softened
- 1/3 cup caster sugar
- juice of 1/2 a lemon
- 1 tablespoon vanilla extract
- 1 1/2 cup heavy whipping cream
- BLUEBERRY SAUCE:
- 2 cups fresh blueberries frozen will work as well
- 1/2 cup water
- juice of 1 lemon
- 1/2 cup plus 2 tablespoons caster sugar
- 3 tablespoons corn starch dissolved in 1/4 cup water
- 1 tablespoons lemon zest
Instructions
- Combine graham cracker crumbs, melted butter and brown sugar in a bowl and mix until the crumbs have been thoroughly coated with the butter. Press firmly into the bottom and sides of an 8-inch springform pan. Chill.
- In a medium bowl, combine mascarpone, cream cheese, sugar, lemon juice and vanilla and whisk until smooth and creamy. Set aside.
- Whisk cream in another bowl until stiff peaks form. Gently fold the whipped cream into the cream cheese mixture. Pour the filling into the prepared crust, using a flat spatula to flatten the top. Cover and chill several hours or overnight.
- For the sauce, combine blueberries, water, lemon juice and sugar in a small saucepan. Cook over medium heat, stirring gently until the sauce reaches a boil. Reduce heat, add the cornstarch & water mixture and stir gently, as to not break the berries, for 3 minutes, or until sauce is thickened. Fold in lemon zest. Pour sauce over the cheesecake before serving. Will keep 2-3 days in an airtight container stored in the refrigerator.

3-Ingredient Macaroni & Cheese
A quick and easy recipe for macaroni and cheese that uses just 3 ingredients and is ready in under 10 minutes. Perfect as a side dish or quick meal.
PrintServings: 2 people
Ingredients
- 2 cups unsweetened almond milk
- 1 cup macaroni or similar
- 1/2 cup shredded cheese your choice
Instructions
- Bring almond milk to a boil; add pasta and stir. Reduce heat to a gentle boil as the almond milk froths up and boils over quickly. Cook for around 8 minutes or until al dente.
- Stir in shredded cheese and season with salt and pepper. Let sit for a couple of minutes for cheese to melt (it gets thicker as it sits), stir again and enjoy!
Notes
Cooking time will depend on the type of pasta you use; use elbow macaroni for the quickest. You can use any type of cheese, or a mixture of cheeses, you like. Add fresh or frozen vegetables, like broccoli or peas, for the last couple minutes of cooking time.

Espresso Brigadeiros
Traditional Brazilian brigadeiros are taken to a new level with the addition of Nespresso’s new limited edition South American Grand Cru, Cauca.
PrintServings: 14 brigadeiros
Ingredients
- 1 395 g can sweetened condensed milk
- 1 teaspoon slightly salted butter room temperature
- 1 teaspoon liquid glucose
- 4 tablespoons sifted cocoa powder
- 1 capsule Nespresso Cauca freshly extracted and cooled
- extra butter room temperature, to grease plate and hands
- Roughly 1/3 cup sifted cocoa powder extra, in a shallow bowl
- 15 Mini baking cups
Instructions
- In a heavy-bottomed saucepan, combine sweetened condensed milk, butter, liquid glucose, 4 tablespoons sifted cocoa powder and espresso and stir until combined. Place on the stove and heat to boiling, stirring constantly. Reduce heat to low and stir constantly for 10-40 minutes. The length of time will depend on the heat and type of pan used.
- The mixture will be ready when it very slowly comes back together when cut with a spoon across the bottom of the pan.
- Transfer the mixture to a shallow plate or bowl that has been rubbed with a bit of butter to prevent sticking. Set aside and allow to cool, about 30-40 minutes. The mixture will continue to firm up.
- Rub hands with a bit of butter, scoop out a tablespoon (I used 25g for each brigadeiro) of the mixture and roll into a ball. Toss the brigadeiro into the 1/3 cup sifted cocoa powder, tap off excess cocoa powder and place into a mini baking cup. Repeat until the mixture is used up.
- Serve immediately. Can be stored in an airtight container up to 3 days in the refrigerator, but the coffee flavor won’t be as strong.
Notes
* If you don’t have slightly salted butter, use unsalted butter and add a pinch of finely ground sea salt. * You can use light corn syrup instead of the liquid glucose.

Ingredients
- 8 Biscoff biscuits
- 1-2 tablespoons Biscoff spread I use creamy
- 4 squares dark chocolate I used Lindt 70%
- 4 marshmallows
Instructions
- Preheat oven to 160C (if you’re not sitting at a campfire, that is!). Line a baking tray with baking paper.
- Spread 4 of the biscuits with a little bit of Biscoff spread and place them on the baking tray. Break the chocolate into four smaller squares (as you see in the photos above) and arrange them close together on top of the spread. Cut the marshmallows in half and place two, sticky side up, on top of the chocolate of each biscuit. Lie the remaining 4 biscuits on top of the marshmallows and push down gently.
- Carefully put the tray in the oven so the s’mores won’t topple over, then bake for 4-6 minutes. Keep your eye on them constantly as when the marshmallows start melting, they’ll melt really quickly. Take them out when you see the chocolate has melted and the marshmallows have melted only a little bit. They’ll continue to melt as they sit.
- They’ll be messy to eat, but so delicious! Enjoy!
Notes
Biscoff is also known as Speculoos, or Speculaas, or sometimes just by the company name, Lotus. Want to know how to make your own (even better) version? Check out my homemade Biscoff spread recipe here.

Chocolate Mousse With Rose-Scented Whipped Cream
A decadent, fool-proof chocolate mousse with a Turkish Delight twist.
PrintServings: 2 -3
Ingredients
- For the mousse:
- 200 g dark chocolate chopped
- 180 ml filtered water
- For the rose-scented whipped cream:
- 1 cup thickened cream
- 2 teaspoons powdered sugar
- 2 teaspoons rosewater from Middle Eastern shops
- Extras:
- Handful of pistachios chopped
- Rose-flavored pashmak
Instructions
- For the mousse:
- Prepare an ice bath by filling a large bowl halfway with cold water and ice cubes. Grab a smaller bowl that fits inside the ice bath and set it nearby.
- Place the chocolate and water into a small, heavy-bottomed saucepan and place over low heat. Whisk until chocolate is melted and the mixture is smooth.
- Pour the chocolate mixture into the smaller bowl you set aside earlier, then place this bowl into the ice bath. Make sure not to get any of the ice water into your chocolate. Now just whisk away until the chocolate has thickened slightly. It’ll take a while to thicken, but once it starts thickening, things will start happening fast. It might take up to 10 minutes if you’re whisking by hand, but just a few minutes if you’re going with the electric whisk.
- Take care not to over-whisk, as the mousse will turn grainy. If this happens, just transfer the chocolate back to the pan and re-melt until smooth. Then pour back into the bowl, set it over the ice bath again, and re-whisk, keeping a close eye on the consistency of the mousse.
- Immediately pour or scoop into serving glasses and set aside.
- For the whipped cream:
- Before beginning, ensure you’ve chilled your whisking tools for at least 15 minutes, as this will speed up the process. Add all ingredients into a mixing bowl, and use your preferred method to whisk the cream until stiff peaks form. Take care not to over-whisk or the cream will turn grainy. If this happens, you’ll need to start over from scratch.
- Scoop the whipped cream into a piping bag fitted with a large round tip and pipe a mound of whipped cream on top of the mousse.
- Sprinkle the whipped cream with chopped pistachios and carefully place some strands of pashmak next to the cream.
- Once you add the pashmak, serve immediately, as the pashmak will quickly start to melt into the cream and mousse.
Notes
Use chocolate with 70% cocoa solids, and choose a brand of chocolate you like eating plain.
Be sure to use real rosewater, and not the cheap stuff you find at the average supermarket.
Be sure to use real rosewater, and not the cheap stuff you find at the average supermarket.

Espresso & Rum Chocolate Cloud Cake With Tonka Bean Whipped Cream
An intensely deep dark chocolate cake with espresso, rum and hints of citrus. The crater that forms in the middle of the cake while cooking is the perfect place for a fluffy cloud of tonka bean whipped cream.
PrintServings: 8 -12
Ingredients
- For the cake:
- 250 g dark chocolate 70% cocoa solids
- 125 g unsalted butter softened
- 6 large eggs room temp (2 whole, 4 separated)
- 175 grams caster sugar divided
- 1 capsule Nespresso Cubania
- 3 tablespoons rum
- 1 tablespoon finely grated candied orange peel or zest from 1 orange
- For the tonka bean syrup:
- 1/2 cup water
- 1/2 cup caster sugar
- 1/2 to nka bean finely grated
- 1/4 teaspoon pure vanilla extract
- For the whipped cream:
- 500 ml thickened cream
- 1 tablespoon tonka bean syrup
Instructions
- For the cake: Preheat oven to 180C. Line the bottom of a 23cm springform tin with baking paper.
- Melt the chocolate in a double boiler, then add softened butter and stir to melt the butter into the chocolate.
- Beat the 2 whole eggs and 4 egg yolks with 75g of the caster sugar, then gently add the chocolate mixture, the contents of the Cubania capsule, rum and orange zest.
- In another bowl, whisk the 4 egg whites until foamy, then gradually add the remaining 100g of sugar and whisk until the whites are holding their shape but not too stiff.
- Fold a dollop of the egg whites into the chocolate mixture to lighten, and then fold in the rest of the whites. Pour into the prepared tin and bake for 35-40 minutes or until the cake is risen and cracked and the centre is no longer wobbly. Cool the cake in its tin on a wire rack; the middle will sink as it cools.
- When ready to serve the cake, place the still tin-bound cake on a cake stand or plate for serving and carefully remove the cake from its tin. Don’t worry about cracks or rough edges: it’s the rustic, crater look you’re after.
- For the tonka bean syrup: While the cake is baking, prepare the tonka bean syrup by placing all ingredients in a small saucepan over medium-high heat and stir until the sugar is dissolved. Reduce heat and simmer for 10 minutes, swirling the pan occasionally. Remove from heat, pour into a heatproof jar and cool completely. Store leftovers in the refrigerator.
- For the tonka bean whipped cream: Whisk the cream until it’s soft and then add a tablespoon (plus maybe a dash more if you wish!) of the cooled tonka bean syrup (it has to be cool, otherwise your cream may not whip up) and continue whisking until the cream is firm but not stiff.
- Fill the crater of the cooled cake with the whipped cream, easing it out gently towards the edges of the cake, making dips and mounds in the cream to give it a fluffy cloud sort of look.
- Serve immediately. Any leftovers should be stored in the refrigerator and consumed within a day or two.
Notes
Again, don’t be alarmed by the dramatic sinking of the cake as it cools! It’s supposed to sink! 🙂 The citrus notes aren’t very strong in the cake. If you’d like more of a citrus flavor, use a fresh orange. Otherwise, feel free to leave it out if you can’t find/don’t want to make candied orange peels. If you can’t find/don’t want to use tonka beans, use a mixture of pure vanilla and almond extracts (equal parts). Feel free to leave the rum out if you’re serving children or anyone who does not consume alcohol. Substitute 1-2 tablespoons espresso powder if you don’t use Nespresso capsules. Try to avoid instant coffee granules unless absolutely necessary. Don’t worry about using tonka beans! They’re only toxic in large amounts! 🙂

Rum & Tonka Bean Dark Chocolate Truffles
Dark chocolate truffles with a unique rum and tonka bean twist.
PrintServings: 15 -18 3cm squares
Ingredients
- 125 ml 1/2 cup thickened cream
- 1/2 to nka bean or 1 whole small bean
- 400 g dark chocolate chopped
- 2 tablespoons rum
- Cocoa powder for dusting
Instructions
- Add cream to a small saucepan and finely grate the tonka bean over it. Give it a few stirs and gently heat until just under a simmer – do not let it boil. Remove from the heat and let infuse for 15 minutes. Strain the cream and return to the saucepan.
- Gently reheat the cream to just under a simmer – do not let it boil – then reduce the heat to low and add the chopped chocolate to the cream. Stir constantly until the chocolate is just about melted and a few smallish lumps remain. Remove from the heat and stir the chocolate until it is smooth and the lumps have melted.
- Stir in the rum until it is completely combined and the chocolate is silky and smooth. Line an approximate 17 x 11.5cm dish with parchment paper (make sure some of the paper overhangs for easy removal later) and pour the chocolate into it. Place into the refrigerator to set for at least 4 hours.
- Remove the dish from the refrigerator and pull out the chocolate using the overhanging parchment paper. Peel away the paper from the chocolate.
- Warm a sharp, straight knife under running water from the tap and dry completely. Trim off the messy edges from the chocolate (only if you want all neat edges, otherwise, don’t worry about trimming the edges). Cut the remaining rectangle of chocolate into 3cm squares (or whatever size you’d like).
- Once you’ve made all the cuts, dust some cocoa powder over the squares and serve within an hour or two for maximum flavor.
- Store leftovers in the refrigerator, but know the subtle flavor of the rum and tonka bean will diminish overnight.

Hazelnut Espresso Panna Cotta
A delicious hazelnut-flavored espresso panna cotta layered with chocolate hazelnut spread.
PrintServings: 2 -3
Ingredients
- 2 Nespresso Hazelnut Dessert capsules extracted and cooled completely*
- 1 teaspoon gelatin
- 3/4 cup thickened cream
- 2 tablespoons light brown sugar use more or less depending on tastes
- Pinch of sea salt
- 1/4 cup chocolate hazelnut spread you may need more or less*
Instructions
- Pour coffee into a small saucepan and sprinkle the gelatin on top. Set for 5 minutes to allow the gelatin to bloom. Add cream, sugar and salt, place the pan on the stove and increase heat to medium, stirring well to dissolve the sugar. Heat for around 3 minutes, being careful the mixture does not boil. Remove from the heat, set aside for a few minutes to cool. Pour the mixture into serving glasses. I used a total of 3 100ml glasses, but did not fill them up completely.
- Place in the freezer for 30-40 minutes, stirring very gently every 10 minutes. This is to prevent the panna cotta mixture from separating, as happened to me (if your mixture isn’t separating, just place the glasses in the refrigerator and skip this step!). Do ensure to stir gently so as not to splash the mixture up the sides of the glasses.
- Once the mixture has set enough and doesn’t separate anymore, place the panna cottas in the refrigerator and set for at least 4 hours or overnight.
- Just before serving, place the chocolate hazelnut spread in a microwave safe container and warm slightly in the microwave until it’s pourable (should take around 15 seconds, don’t make it hot!). Gently spoon or pour 1-2 tablespoons of the spread on top of the panna cottas and shake/tilt the glass very carefully to get an even, smooth layer. Repeat with remaining panna cottas. The amount of the spread you need depends on how large your serving glasses are.
- Allow to set at room temperature for around 10 minutes, then serve immediately.
Notes
* As a substitute, use strongly brewed hazelnut-flavored coffee, or strongly brewed plain coffee spiked with hazelnut liqueur, or just strongly brewed plain coffee.
* I used Nutella, but you can use homemade choc hazelnut spread as well.
* I used Nutella, but you can use homemade choc hazelnut spread as well.

Raw Caramel Slice
A decadent raw & vegan version of the classic caramel slice.
PrintServings: 10 bars
Ingredients
- For the base:
- 3/4 cup 120g almonds
- 1/3 cup 25g dessicated coconut
- 6 fresh dates pitted
- 1/4 cup 60g coconut oil, melted
- For the caramel filling:
- 12 fresh dates pitted
- 1/3 cup 95g almond butter
- 2 tablespoons pure maple syrup
- 2 teaspoons vanilla bean paste
- pinch sea salt flakes
- For the ganache:
- 1/3 cup 35g raw cacao powder
- 1/4 cup 60ml coconut oil, melted
- 1/2 cup 180g rice malt syrup
Instructions
- Lightly grease a 20cm (8-inch) square pan and line with baking paper, leaving an overhang on the sides (helps to remove the slice from the pan later). Set aside.
- For the base: Place all ingredients for the base in a food processor and process for 1-2 minutes, or until the mixture resembles fine breadcrumbs. Press the base mixture into the prepared pan. Refrigerate as you prepare the filling.
- For the caramel filling: Place all ingredients for the filling in the food processor (you don’t have to wash it after preparing the base, just wipe it out) and process for 1-2 minutes or until smooth. It will be quite thick. Spread over the base and return the pan to the refrigerator as you prepare the ganache.
- For the ganache: Place all ingredients for the ganache in a heatproof bowl over a saucepan of simmering water and whisk for 2-3 minutes or until all ingredients are incorporated and smooth. Pour mixture over the caramel filling and refrigerate for 2 hours or until set.
- Freeze for 30 minutes before slicing into 4cm x 10cm bars.
- Serve chilled. Store leftovers in the refrigerator; can be stored frozen as well. If frozen, allow to set at room temperature (about 10 minutes) to soften a bit.

Baked Cinnamon Donuts
These baked cinnamon donuts are quick, easy and insanely delicious! Great to make with the kids, too!
PrintServings: 12
Ingredients
- For the donuts:
- 71 g 5 tablespoons unsalted butter, softened
- 1/2 cup sugar
- 1 egg room temperature
- 1/2 cup whole milk room temperature
- 1 teaspoon vanilla bean paste*
- 1 tablespoon baking powder
- 1/2 teaspoon salt
- 1/4 rounded teaspoon ground nutmeg
- 1 1/2 cups all-purpose flour
- For the coating:
- 113 g 1/2 cup unsalted butter
- 1 cup sugar
- 1/2 well-rounded tablespoon cinnamon
Instructions
- Preheat oven to 180C (350F). Lightly grease two mini donut pans*.
- In a medium bowl, whisk together baking powder, salt nutmeg and flour. Set aside.
- In another bowl, whisk together egg, milk and vanilla. Set aside.
- In the bowl of a stand mixer, or using a hand mixer, cream together the butter and sugar until light and fluffy.
- Add the wet ingredients in two parts (mixture may look curdled), alternating with the dry ingredients. Mix last addition of dry ingredients just until combined; do not overmix.
- Spoon the batter into a piping bag or a large ziplock bag with a corner cut off. Pipe batter into the donut pan, filling each donut cavity 1/2 full.
- Bake for 10-12 minutes, or until donuts spring back when lightly touched. Tip the donuts out onto a wire rack.
- While the donuts are baking, melt the 113g butter for the coating. In another bowl mix the cinnamon and sugar together until completely combined. Pour the cinnamon-sugar mixture into a large ziploc or paper bag (you’re going to shake the donuts in the mixture!).
- To coat the donuts, when they’re just cool enough to handle, dip each donut quickly in the melted butter, gently shake off excess butter, then put the donut in the cinnamon-sugar bag. Seal the bag and gently shake, turn and invert the bag to completely coat the donut. When coated, open the bag, gently shake off excess and place on a gorgeous serving plate to enjoy!
- Store in an airtight container for a day or two, but best eaten within 24 hours.
Notes
* I used Beanilla triple-fold Madagascan vanilla bean paste, so I only used around 1/3 teaspoon. If you have regular vanilla bean paste, use a full teaspoon. If you only have vanilla extract, feel free to use that instead. * This recipe can also make regular-sized donuts, just adjust the baking time for slightly longer – but keep your eye on the donuts so you don’t overbake them. Don’t have a donut pan? Use a mini muffin/cupcake pan!

Ingredients
- For the donuts:
- 1 1/3 cups all-purpose flour
- 1/4 cup + 2 tablespoons caster sugar
- 3/4 teaspoon baking powder
- 1/8 teaspoon baking soda
- scant 1/2 teaspoon nutmeg
- scant 1/2 teaspoon salt
- 1/4 cup milk room temperature
- 1/4 cup sour cream room temperature
- 1 egg room temperature
- 2 tablespoons 30g butter, melted and cooled
- 2 tablespoons grapeseed oil*
- 1 teaspoon pure vanilla extract
- For the icing:
- 7 oz 200g white chocolate, chopped
- 1/2 teaspoon grapeseed oil* not necessary, but recommended
- pink gel food coloring if desired
- rainbow sprinkles if desired
- candy-coated chocolate eggs to fill the sugar nests
- For the spun sugar nests:
- 2 cups caster sugar
- 1/2 cup light corn syrup or liquid glucose
- 1/2 cup water
Instructions
- For the donuts: Preheat oven to 375F/190C. Spray two mini-donut pans with non-stick cooking spray, or smear on a little melted butter if you prefer. Set aside.
- Sift flour, sugar, baking powder, baking soda, nutmeg, and salt into a mixing bowl; whisk to combine and make a well in the center. In a separate bowl, whisk together milk, sour cream, and eggs; whisk in melted butter, oil, and vanilla. Pour the milk mixture into the dry ingredients and stir with a silicone/rubber spatula until just combined. Batter will be a little lumpy; do not overmix as this will make the donuts a bit on the tough side.
- Transfer batter to a piping bag fitted with a large, round tip (or a ziploc bag, then seal it up and snip off a bottom corner). Pipe the batter into the donut pan, filling 3/4 full, and getting the batter as even as possible around the donut rings (if more batter is piped on one side of the ring than the other, you’ll probably end up with uneven donuts!).
- Bake until doughnuts are risen and lightly browned on the edges, 8-10 minutes. Cool in the pan for 5 minutes, then remove the donuts to a wire rack to cool completely.
- For the icing: Place chocolate and oil, if using, in a heatproof bowl set over a saucepan of barely simmering water. Stir occasionally until the chocolate is melted and smooth. Remove from heat. Add food coloring, if desired. Let chocolate set, or briefly place in the refrigerator, to firm slightly, until it is not so runny so as to drip straight off the donuts. A good way to test is to dip a clean, dry spoon into the chocolate, grab up a spoonful and let it fall back into bowl; if it piles up on top of itself for a few seconds before melting back in, it’s ready.
- Dip the tops of the donuts into the chocolate icing, and place back on the wire rack. Add sprinkles, if using. Set donuts aside for the icing to harden (or place briefly in the refrigerator, or freezer if you’re in a hurry).
- For the sugar nests: Place all ingredients into a saucepan over medium heat. Cook until the sugar is melted, stirring very gently occasionally. Brush sides of pan with a wet pastry brush if sugar ends up on the sides of the pan. Once sugar has melted, increase heat to medium-high. Using a candy thermometer, cook until the temperature reaches 305F/151C, do not stir. This takes up to 15 minutes or so (so in the meantime, prepare an ice bath in the sink or a large heatproof bowl), and the last few degrees go quickly, so perhaps remove from heat just a few degrees earlier. Dunk the bottom of the saucepan into the ice bath, let the bubbles in the melted sugar mixture settle, and begin making spun sugar!
- While the sugar is cooking, and probably before you prepare the ice bath, prepare your sugar-flinging area. You can do this over your sink, or over your kitchen counter. Anchor a couple of wooden spoon handles over the edge of your kitchen counter (I used a big heavy wooden cutting board to hold them in place, but masking tape would work as well). Cover the floor under your workspace with newspaper, dropcloth, parchment paper, or similar.
- Be careful here because the sugar will be hot!! Using a wire whisk with the ends cut, or a couple of forks held back-to-back (hold them together with rubber bands), dip the prongs into the melted sugar, briefly hold above the pan for any big drips to fall back into the pan, then quickly start flinging your sugar-flingling utensil over the wooden spoon handles. Use your wrist to make a sort of waving/flinging motion, at least 12 inches/30cm above the spoon handles. Be sure to work quickly!
- When the sugar strands falling from your sugar-flinger have hardened, prop it above the pan of melted sugar, then with clean, cool, dry hands, carefully grab a handful of sugar strands and gently mold them into the shape of a nest. Repeat this process as necessary. Eventually the melted sugar will cool down and become too hard to work with anymore.
- Place all your spun sugar nests on your Easter donuts, nestle in a few candy-coated chocolate Easter eggs, and serve immediately. The sugar nests will begin to melt down eventually, once prepared, and will do so even quicker on warm/humid days. While the donuts can be prepared in advance, make the spun sugar nests immediately before serving to avoid disappointment.
Notes
* I always use grapeseed oil in baking, but you can also use canola oil. Any flavorless oil should do the trick.
Note that if you have trouble removing leftover hardened sugar in your saucepan, cover the sugar with hot water and let sit overnight. Eventually it will dissolve! If it isn’t dissolving, just keep refilling with hot water as it cools. Don’t worry, your pan isn’t ruined, it will dissolve! 🙂
Note that if you have trouble removing leftover hardened sugar in your saucepan, cover the sugar with hot water and let sit overnight. Eventually it will dissolve! If it isn’t dissolving, just keep refilling with hot water as it cools. Don’t worry, your pan isn’t ruined, it will dissolve! 🙂

Chocolate Cupcakes With Fudge Frosting
Fudgy, wacky cake-style chocolate cupcakes with luscious, velvety chocolate frosting and sprinkles. Super easy to make, no stand mixers required, completely egg-free and done in under an hour. Perfect for all types of celebrations or just simply for a really indulgent dessert!
PrintServings: 11 cupcakes
Ingredients
- For the cupcakes:
- 1½ cups all-purpose flour
- 1 cup white sugar*
- ½ teaspoon salt
- 1 teaspoon baking soda
- ¼ cup dark cocoa powder
- 6 tablespoons grapeseed oil or other flavorless oil
- 1 tablespoon white vinegar
- 1 teaspoon pure vanilla extract
- 1 cup cold water
- For the frosting:
- 255 g unsalted butter softened
- 125 g powdered sugar sifted
- 40 g dark cocoa powder
- 1/4 cup 60ml hot water
- 1/4 cup sour cream or creme fraiche*
- 1 teaspoon pure vanilla extract
- generous pinch of salt
- 150 g dark chocolate chopped, melted, cooled
- sprinkles
Instructions
- For the cupcakes: Preheat oven to 350F. Line a 12-hole cupcake pan with paper liners (this recipe makes 11 cupcakes, so you can leave a hole empty!). Set aside.
- In a medium bowl, sift in flour, sugar, salt, baking soda and cocoa powder. Whisk to combine.
- Using a spoon, make 3 wells in the dry ingredients, one large well and two smaller wells. Pour the grapeseed oil into the largest well, the vinegar into one of the smaller wells, and the vanilla extract into the last well. Pour the cold water over everything and whisk the ingredients together until the mixture is smooth. The batter will be quite runny.
- Fill cupcake liners 3/4 full with batter. Bake for 15-20 minutes. They are done when the tops spring back when lightly pressed in the center (or you can do the toothpick test).
- Remove from the oven and cool in cupcake pan for a few minutes, then transfer to a wire rack to cool completely.
- For the frosting: While the cupcakes are baking, add butter, powdered sugar, cocoa powder, hot water, sour cream, vanilla and salt to the bowl of your food processor (see recipe notes if you don’t have a food processor). Process until combined and no lumps of butter remain. Pour in the cooled, melted chocolate and process briefly to combine. If the frosting is too loose/runny to pipe or spread, place it in the refrigerator for 5 or 10 minutes and stir every once in a while to keep an eye on the consistency; don’t let it get too firm.
- Transfer to a piping bag fitted with a large, round tip and pipe mounds of the frosting on the cupcakes. To get the little “sprinkle pond” in the middle, hold the cupcake in your non-dominant hand and a small spoon in your dominant hand. Press the back of the spoon into the middle of the frosting, and at the same time, twist the cupcake counter-clockwise while you twist the spoon clockwise. Hard to describe, but easy to do once you get the hang of it. You can also pipe swirls, or just simply spread the frosting on the cupcake!
- Decorate with sprinkles!!! If not serving straight away, don’t add sprinkles just yet; the moisture in the refrigerator makes the sprinkles go soggy and causes the color to run. So let the cupcakes come to room temperature first so the frosting becomes soft, then add the sprinkles just before serving.
- Store in the refrigerator for 3 or 4 days. Frosting will firm up, but tastes great cold anyway. If you prefer, let the cupcakes come to room temperature and the frosting will soften up.
Notes
See bottom of post above for more notes regarding this recipe. * I always use a scant cup of sugar, which means just a bit under a cup. * You can also use plain Greek yogurt instead of sour cream or creme fraiche. Use a good, high-quality cocoa powder for a great-tasting chocolatey cake and frosting. I always use my favorite cocoa powder – Van Houten. If you don’t have a food processor: In the bowl of your stand mixer fitted with the paddle attachment, or with a handheld mixer, beat the butter on medium speed until pale and fluffy, about 6 minutes. Sift together the powdered sugar and cocoa powder. Reduce speed to low and add the sugar/cocoa mixture, water, sour cream, vanilla and salt and beat until incorporated, about 1 minute. Increase the speed to medium and beat for 2 more minutes. Add the melted chocolate and beat on medium speed until smooth, about 1 minute.

Ingredients
- 100 g dark chocolate finely chopped
- 1/4 cup 60ml pouring cream
- 2 cups 180g white marshmallows
- 1 tablespoon milk
- 2 litres store-bought vanilla ice cream
- 100 g malt biscuits* finely crushed
Instructions
- Place a 2-litre freezer-safe container (I use a reusable plastic ice cream container, but you can also use a metal loaf tin) in the freezer until ready to use.
- Place the chopped chocolate in a small bowl. Heat the cream in a small saucepan over medium heat until just before boiling (do not let boil). Pour the cream over the chocolate and stir until completely melted and smooth. Refrigerate for 20 minutes to cool.
- Meanwhile, heat marshmallows and milk in a medium saucepan over low heat and stir until melted. Remove from heat and set aside.
- Transfer the ice cream to the bowl of a stand mixer and beat on low speed until softened (but not melted).
- Working quickly, add the marshmallow mixture, chocolate ganache and biscuit crumbs to the ice cream and fold gently with a big wooden spoon or spatula a few times to get a swirly look. Make sure it’s only just swirled through and that you still have globs of marshmallow and ganache – you don’t want to completely mix these in.
- Transfer the ice cream to the pre-chilled container and freezer for 2-4 hours or until set.
- Will keep in the freezer for 4-5 days.
Notes
Use graham crackers if they are available where you live. In Australia, we have to use alternatives such as malt biscuits!

Red Velvet Hot Chocolate
An easy and delicious recipe for red velvet-inspired hot chocolate with white chocolate whipped cream and red velvet cake crumbs.
PrintServings: 1 or 2 servings
Ingredients
- For the hot chocolate:
- 1 cup whole milk or milk of choice
- 45 g good quality dark chocolate at least 70%, chopped
- 15 g good quality milk chocolate chopped
- 1/4 teaspoon pure vanilla extract
- 1/2 teaspoon red food coloring optional
- red velvet cake crumbs optional
- For the whipped cream:
- 1/2 cup thickened cream chilled
- 30 g good quality white chocolate melted and cooled
Instructions
- For the whipped cream: With a handheld mixer (or mixer of choice), whisk cream until soft peaks begin to form. Pour the melted and cooled white chocolate into the whipped cream and whisk gently until firm (do not over-whisk or the mixture will turn grainy). Set aside.
- For the hot chocolate: In a small saucepan, heat milk over medium heat until hot and steaming, but not boiling. Reduce heat to low and whisk in dark and milk chocolates until melted. Stirring constantly with the whisk, cook for another couple of minutes so it’s nice and warm. Remove from the heat and whisk in the vanilla and red food coloring, if using.
- Pour hot chocolate into 1 or 2 serving glasses (that’s 1x 1-cup serving, or 2x 1/2 cup servings). Use a spoon to plop in a good dollop of white chocolate whipped cream, or pipe it on, if you prefer. Sprinkle over the red velvet cake crumbs, if using.
- Enjoy immediately!

Ginger Granola
An easy recipe for ginger granola, featuring three different kinds of ginger! Perfect for breakfast or an on-the-go snack!
PrintServings: 3 1/2 cups
Ingredients
- 1 1/2 cups 120g rolled oats
- 1/2 cup 30g sliced almonds
- 1/2 cup 50g pecan halves
- 1/3 cup 20g pumpkin seeds
- 1/3 cup 20g unsweetened flaked coconut
- 3 tablespoons millet
- 3 tablespoons buckwheat groats
- 2 tablespoons The Ginger People Crystallized Ginger Bits
- 2 teaspoons ground cinnamon
- 1 teaspoons ground ginger
- 1/3 cup 45g unsalted butter, melted (or coconut oil)
- 1/3 cup 80ml The Ginger People Ginger Syrup
Instructions
- Preheat oven to 275F (135C). Line a large baking sheet with baking paper. Set aside.
- In a large bowl, mix the oats, almonds, pecans, pumpkin seeds, coconut, millet, buckwheat groats, Crystallized Ginger Bits, cinnamon and ginger together.
- Add the melted butter and Ginger Syrup to the bowl and stir until all the dry ingredients have been thoroughly coated with the butter and syrup.
- Spread the granola on the baking sheet into a thin, even layer. Note, if you want clusters, make sure that the granola is somewhat stuck together; don’t leave big gaps in the layer.
- Bake for 25 minutes, then rotate the pan. If you want clusters, DO NOT stir the granola. Bake for another 20 to 30 minutes, or until the granola is golden brown. Keep an eye on it, as it once it starts to brown, it’ll go quickly.
- Remove from the oven and let cool on the tray for 30 minutes. Break the granola up and enjoy it with milk, yoghurt, ice cream, or however you like! It’s just as delicious as a quick, crunchy snack, too!

Chocolate-Coated Peanut Butter Truffles (Buckeyes)
A quick and easy no-bake chocolate + peanut butter dessert, perfect for last minute holiday treats or gifts.
PrintServings: 2 dozen
Ingredients
- 3/4 cup smooth/creamy peanut butter
- 1/4 cup 57g unsalted butter, softened
- 1/2 teaspoon pure vanilla extract
- 1/4 teaspoon salt
- 1 3/4 cup powdered sugar
- 170 g dark chocolate chopped
Instructions
- Combine peanut butter, butter, vanilla and salt in large a bowl. Beat with an electric mixer on low speed until blended. Add powdered sugar, beating until perfectly combined and a firm, smooth dough forms. Note, you don’t need an electric mixer for this; just use a wooden spoon and some stirring power, eventually giving up the spoon and simply kneading the mixture together with your hands until that smooth dough forms. You’ll need it to be able to stick together in a ball shape with no crumbly bits.
- Using a 1-tablespoon measure, shape the peanut butter mixture into balls and place onto a parchment/baking paper-lined tray. You should get around 2 dozen. Refrigerate for 30 minutes.
- Meanwhile, melt the dark chocolate using your preferred method (microwave or double-boiler; I use the double boiler method). Transfer the melted chocolate to a tall, thin cup or glass.
- Use a toothpick to stick into each of the peanut butter truffles and pick them up, one by one, and while holding the toothpick, dip the truffle into the melted chocolate, almost to the top, but not quite (refer to above photo).
- If you find your truffle falling off the toothpick, use a fork, or extra toothpicks, to help hold the truffle on while scraping off the excess chocolate. It shouldn’t fall off, though, if you work quickly. If your kitchen is warm, just take a few peanut butter truffles out of the refrigerator at a time to work with (the chilled truffles hold onto the toothpick better than when they’re warm).
- Place the dipped truffles back on the lined tray. When finished dipping, remove the toothpicks and very gently smooth over the toothpick-hole with your finger, or the back of a spoon.
- Refrigerate the buckeyes for at least 30 minutes. Then, serve, or pack into your gift boxes!

Valentine’s Strawberry Jell-O Shots
Using just a box of Jell-O and some whipped cream, you can create this fun and easy treat for that special someone in your life!
PrintServings: 8 people
Ingredients
- 1 3 oz box Jell-O or 85g box Aeroplane Jelly (any flavor)
- 500 ml thickened cream chilled*
- 5 tablespoons powdered sugar
- 3/4 teaspoon pure vanilla extract
- Fresh strawberries washed and dried
Instructions
- Place 8-10 shot glasses into a 12-cup cupcake baking pan so that the glasses are tipped on their sides. Set aside.
- Prepare jelly according to package directions. Transfer jelly to a cup or jug with a pouring spout and carefully pour the jelly into each of the shot glasses. If you find it easier, lift out the shot glass, keeping it sideways, and carefully pour the jelly into the glass while holding it, then gently place it back, sideways, into the cupcake pan. Pour the jelly almost up to the rim of the glass while the glass is on its side.
- Refrigerate the jelly for at least 2 hours, or until firm.
- Just before you take the jelly out of the refrigerator, prepare the strawberry hearts. Cut the tops off the strawberries and slice the strawberries in half. Place the strawberries cut-side down, and using a small heart-shaped cookie cutter, cut hearts out of the strawberry halves. Set aside.
- Pour the thickened cream into a medium bowl. Sift over the powdered sugar and add the vanilla extract. Whisk the cream to stiff peaks (using an electric mixer, or by hand), being careful not to overbeat the cream.
- Transfer the whipped cream to a piping bag and cut the tip off (leaving an opening somewhere around medium-sized, but not too big). Pipe a circle of whipped cream around the edge of the jelly, next to the glass (I found that this helps eliminate pockets of air around the top edge of the jelly layer). Then place the piping bag tip in the middle of the circle and squeeze out the whipped cream until it reaches the top of the glass. Feel free to use a star tip, or do some fancy swirls, if you like! You can also just spoon it into the glass, either way will still look great!
- When finished piping all of the whipped cream, gently place a strawberry heart in the middle of each mountain of whipped cream. Serve immediately, or refrigerate up to 6 hours, covered.
Notes
* You can also use thawed Cool Whip, if preferred, or it’s is easier for you.

Hedgehog Slice
A fancied-up Australian treat that is full of chocolate, cookies, coconut and pecans and coated with a beautiful dark- and white-chocolate swirl!
PrintServings: 30 squares
Ingredients
- 250 g packet of plain biscuits*
- 1/2 cup desiccated coconut
- 1/2 cup toasted pecans* roughly chopped
- 2 tablespoons cocoa powder sifted
- 150 g dark chocolate chopped
- 100 g unsalted butter chopped
- 395 g can sweetened condensed milk
- Topping:
- 200 g dark chocolate chopped
- 80 g white chocolate chopped
Instructions
- Line the base and sides of a 30x20cm baking tin with baking paper and set aside.
- In a small saucepan, heat the dark chocolate, butter and sweetened condensed milk over low heat for 5 minutes or until the mixture has melted. Set aside for a few minutes to cool.
- Meanwhile, place the biscuits into a zip lock bag, and push out all the air before sealing. Use the end of a rolling pin to carefully crush the biscuits. Place the broken biscuits in a large bowl and add the coconut, pecans and cocoa.
- Pour the melted chocolate mixture into the dry ingredients, and mix until well combined and all the dry ingredients have been thoroughly coated.
- Press firmly into the prepared tin (if you’re having trouble just using your spoon to press it in, place a piece of baking paper on top of the mixture and then press the mixture down with your hands) and refrigerate for 30 minutes or until firm.
- To make the chocolate topping, place chopped dark chocolate in a heatproof bowl over a saucepan of simmering water. Stir regularly until the chocolate is smooth.
- Meanwhile, place the chopped white chocolate in a microwave-safe container and microwave the white chocolate in 20- to 30-second intervals, stirring thoroughly after each 20-30 seconds.
- Grab the hedgehog slice out of the refrigerator and pour the melted dark chocolate over the slice. Smooth the chocolate out to the edges by tilting the pan. Once the top is completely coated, give the pan a couple taps on your workspace to pop out any air bubbles. Then, spoon some blobs of melted white chocolate on top of the dark chocolate (you don’t need to use all the white chocolate). Using a toothpick, swirl the white chocolate blobs into the dark chocolate until you are happy with your design. Tap the pan on your workspace a couple more times to flatten out the chocolate topping.
- Place the hedgehog slice back into the refrigerator for 1 hour or until completely set.
- Cut the slice into small squares and serve. Store in an airtight container in the fridge.
Notes
Use your favorite cookies and nuts in this recipe!

Mint Chocolate Baked Donuts
These fudgy mint chocolate baked donuts have a subtle hint of mint in the white chocolate icing and are so easy to create!
PrintServings: 12 people
Ingredients
- 2/3 cup Dutch-processed cocoa powder
- 1 3/4 cups plain flour
- 1 1/4 cups light brown sugar packed
- 1 teaspoon baking powder
- 1 teaspoon baking soda
- 3/4 teaspoon espresso powder optional
- 3/4 teaspoon salt
- 2 large eggs room temperature
- 3/4 cup whole milk room temperature
- 2 teaspoons pure vanilla extract
- 2 teaspoons vinegar white or cider
- 1/2 cup unsalted butter melted, or 1/3 cup flavorless oil
- Mint icing:
- 200 g white chocolate chopped
- 1/2-3/4 teaspoon peppermint extract
- Green food coloring gel
- 75 g dark chocolate chopped
Instructions
- Preheat the oven to 350F (180C). Lightly grease the wells of two donut baking pans (you can use either mini-sized (yield 22 donuts) or regular-sized (yield 12 donuts) and set aside.
- In a large mixing bowl, whisk together the cocoa powder, flour, brown sugar, baking powder, baking soda, espresso powder and salt.
- In a medium-sized mixing bowl, whisk together the eggs, milk, vanilla, and vinegar. You may notice some curdling of the milk, which is fine.
- Add the wet ingredients, along with the melted butter or oil, to the dry ingredients. Stir gently with a wooden spoon until no floury bits remain; take care not to overmix or your donuts may end up a little tough.
- Transfer batter to a piping bag and pipe the batter into the wells of the prepared donut baking pans. Fill them about 3/4 full. If you’re using two mini donut pans, you’ll have to bake in two batches.
- Bake mini-sized donuts for 7-9 minutes; bake regular-sized donuts 10-13 minutes. You can do the toothpick test to check if the donuts are done, or simply lightly press on top of the donuts – if they spring back, they are done. Whatever you do, do not overbake!!
- Remove the doughnuts from the oven, and after 30 seconds or so, loosen their edges (if needed), turn the pan upside down over a rack, and gently let the doughnuts fall onto the rack.
- Let the donuts cool completely before dipping into the icing.
- For the mint icing: Melt the white chocolate using your preferred method. Add 1/2 teaspoon peppermint extract, or a little more, to suit your tastes, and a couple drops of green food coloring – you’ll be after a pastel-like mint green color, so add a little bit at a time, and stir after each addition, until you reach your desired color.
- Carefully dip the cooled donuts into the melted chocolate (if you find the chocolate is a little runny and drips all over the sides of the donuts, set the chocolate aside for a little bit to thicken up). Let the chocolate icing set. You should have plenty of chocolate left to double dip the donuts, so go for a second layer and let it set before adding the dark chocolate drizzle.
- For the dark chocolate drizzle, melt the dark chocolate using your preferred method. Transfer the melted chocolate to a piping bag and cut a small opening in the bottom then drizzle the chocolate over the donuts in a zig-zag motion (you can also just use a spoon to drizzle the chocolate). Let the donuts set once more (if you can wait), then ENJOY IMMEDIATELY!!
- Can be stored in the refrigerator, or at room temperature; best eaten within two days.

Chocolate Peanut Butter Puffed Quinoa Bars
These delicious chocolate peanut butter puffed quinoa bars are so easy to make and are perfect for on-the-go snacks!
PrintServings: 12
Ingredients
- 50 g 1/2 cup rolled oats
- 50 g dark chocolate chopped
- 36 g 1 1/2 cups puffed quinoa*
- 65 g 1 cup shredded coconut
- 1 tablespoon sesame seeds
- 100 g 1/3 cup + approx 1 tablespoon natural peanut butter
- 125 g 1/3 cup + approx 1 tablespoon honey
- 1/2 teaspoon pure vanilla extract
- 150 g dark chocolate chopped
Instructions
- Preheat oven to 180C (160C fan forced). Line an 8×8-inch (20x20cm) baking pan with baking paper, leaving some of the baking paper to hang over the sides. Set aside.
- Place puffed quinoa in a single layer on a large baking tray. Roast for 4 minutes, or until light golden and toasted.
- Place oats and chocolate in a food processor and process until finely chopped. Transfer to a large mixing bowl. Add the puffed quinoa, coconut and sesame seeds.
- Place peanut butter and honey in a small saucepan over a low heat. Warm gently, and stir until well combined; do not let it come to a boil. Remove from the heat and stir in vanilla extract.
- Working quickly, add the honey mixture to the dry ingredients and mix until well combined.
- Transfer the mixture to the prepared baking pan and press firmly – I placed another piece of baking paper on top of the mixture and pressed down with a smaller baking tin so I got it nice and tightly packed in.
- Place in the refrigerator for about 30 minutes, or the freezer for about 15 minutes, to cool down and firm slightly.
- Meanwhile, melt the 150g dark chocolate and transfer to a piping bag (or a ziploc bag).
- Remove from the freezer and lift the bars out of the baking pan; place on another baking tray (will make it easier to move later). Cut a smallish snip off the bottom of the piping bag (or a smallish corner from the ziploc bag) and pipe the chocolate over the bars in a zig zag motion.
- Chill in the refrigerator or freezer until the chocolate is set. Cut into bars with a sharp knife. Store in the refrigerator up to 5 days.
Notes
* If you can’t find, or don’t want to use, puffed quinoa, another other puffed grain will do. You can even use Rice Krispies, if you prefer!

Blueberry Muffin French Toast
Blueberry muffin French toast is made with slices of blueberry muffins and topped with fresh fruit for an easy, yet decadent, breakfast or brunch!
PrintServings: 4 servings
Ingredients
- 4 jumbo blueberry muffins 1-2 days old
- 2 eggs
- 1/2 cup whole milk
- 1/2 teaspoon pure vanilla extract
- 1 teaspoon ground cinnamon
- 1/4 teaspoon ground nutmeg
- unsalted butter to fry
- fresh fruit to serve
- white chocolate to serve, optional
- maple syrup to serve, optional
Instructions
- Slice muffins vertically by cutting a thin slice off the rounded edges on opposite sides (you can eat these thin slices, or discard), then slice the remaining chunk of muffin down the middle so you get two thick slices. You’ll end up with 8 slices in total. Set aside.
- In a small bowl, whisk together the eggs, milk, vanilla, cinnamon and nutmeg until thoroughly combined; transfer mixture to a shallow dish. Place 4 of the muffin slices into the egg mixture, leave for about 5-10 seconds, then flip the slices over to coat the other side for another 5-10 seconds. Transfer the slices to a plate.
- Heat a frying pan (one wide enough to cook 4 slices at a time) over medium heat with about a tablespoon of butter (add about a teaspoon of flavorless oil to keep the butter from turning too brown, if you like). When the butter is melted, smear it around the pan with a spatula and very carefully place the coated muffin slices in the pan. Cook until golden, about 4-5 minutes, then carefully flip the slices over and cook again until golden. When finished, I usually stand the slices up on their edges and lightly cook the sides as well. Remove from the frying pan and set aside on a clean plate.
- Repeat the dipping and cooking procedure with the remaining 4 muffin slices. Whisk in some more cinnamon and nutmeg if the egg-mixture looks a bit bare. You should have only just enough mixture to coat the remaining slices; turn the slices on their sides, if necessary, to coat the entire slice and soak up all the mixture.
- To serve, stack 2 slices on top of each other, top with fresh fruit and grate over some white chocolate with a fine grater. Finally, add a small glug of maple syrup. Serve immediately and enjoy!!

Super Easy Egg-Free Marshmallows
Put down your thermometer and eggs because this marshmallow recipe doesn’t need them! Super easy to make and soft, fluffy marshmallows every time!
PrintServings: 64 1×1-inch marshmallows
Ingredients
- 1 cup water divided
- 3 envelopes 21g unflavored gelatin
- 2 cups caster sugar
- 1 ⁄2 cup light corn syrup or glucose syrup
- 1 ⁄2 teaspoon salt
- 2 tablespoons pure vanilla extract
- about 2 cups icing sugar to coat marshmallows
Instructions
- Grease a 9-inch (22cm) square baking pan with butter and set aside.
- In the bowl of a stand mixer fitted with a whisk attachment, pour in 1⁄2 cup of the water and sprinkle with the gelatin. Set aside to allow the gelatin to soak in.
- In a medium saucepan over high heat, add the sugar, corn syrup/glucose syrup, salt and remaining 1⁄2 cup of water. Bring to a rolling boil and continue to boil for 1 minute. Remove from the heat.
- Turn the mixer on low and mix the gelatin once or twice to combine it with the water. Slowly add the hot sugar mixture, pouring it gently down the side of the bowl, and continue to mix on low.
- NOTE : Be really careful at this point because the sugar mixture is smoking hot!
- When all the hot sugar mixture has been added, turn the mixer to high and continue to whisk for 10 to 12 minutes until the marshmallow batter almost triples in size and becomes very thick. Scrape down the sides of the bowl frequently, if necessary, to avoid the batter overflowing as it grows. Stop the mixer, add the vanilla, and then whisk briefly to combine.
- Transfer the mixture to the prepared baking pan and use a spatula or bench scraper to spread it evenly in the pan. Work quickly, as the marshmallow becomes more difficult to manipulate as it sets.
- Grease a sheet of plastic wrap with butter and lay it across the top of the marshmallow. Press down firmly on the plastic wrap, to seal it smoothly and tightly against the mixture.
- Leave the marshmallow to set at room temperature for at least 3 hours or, even better, overnight (I’ve always let mine set overnight). The marshmallow will be too sticky and soft to cut if you try too soon.
- Sprinkle a work surface or cutting board with the icing sugar. Run a knife along the top edge of the pan to loosen the marshmallow slab. Invert the pan and flip the marshmallow out onto the counter or board. Scoop up handfuls of the icing sugar and rub all over the marshmallow.
- Use a large, sharp knife to cut the slab into 1- × 1-inch squares (you may need to wash the knife off a few times to keep getting clean cuts). Roll each of the freshly cut marshmallow squares in the remaining icing sugar to coat them completely.
Notes
Flavor variations: COFFEE MARSHMALLOWS
Add 1⁄2 cup of strongly brewed coffee or espresso instead of the water in Step 1, and add another 1⁄2 cup of the coffee/espresso instead of the water in Step 2. RASPBERRY MARSHMALLOWS
In a small saucepan over medium heat, warm 1⁄4 cup raspberry jam until it becomes runny, about 3 minutes. Remove from the heat. Place a fine sieve over a small bowl and pour the warm jam through the sieve to catch any seeds and create a puree. Add the puree and one drop of red food coloring at Step 4 of the recipe, after the 10-12 minutes whisking time. Note, I was using liquid food coloring and I needed much more than one drop for the marshmallows to turn pink! Also, in my opinion, the jam did not flavor the marshmallows enough to give a noticeable raspberry flavor; might try using raspberry flavoring instead.

Matcha Strawberry Layered Smoothie
Matcha and strawberries come together in this layered vegan smoothie – and there’s a bonus healthy ingredient in the matcha layer!
PrintServings: 3 glasses
Ingredients
- Matcha layer:
- 2 cups fresh spinach
- 1 cup almond milk chilled
- 1 cup mango chopped, frozen
- 1/2 tablespoon lemon juice
- 1 teaspoon matcha
- pinch of sea salt
- 1-2 tablespoons maple syrup adjust to taste
- Strawberry layer:
- 2 cups strawberries chopped, frozen
- 1.5 cups almond milk chilled
- 1 tablespoon maple syrup adjust to taste
- 1 teaspoon vanilla extract
Instructions
- For the matcha layer:
- Place all ingredients in a blender and blend until completely smooth. Distribute evenly among 2-3 glasses and place in the freezer while preparing the strawberry layer.
- For the strawberry layer:
- Place all ingredients in a blender and blend until completely smooth. Remove the glasses with the matcha layer from the freezer and very gently pour the strawberry layer on top of the matcha layer (if you find that the matcha layer isn’t quite thick enough, you can freeze it for a little longer). To be extra gentle, pour the strawberry layer over the back of a spoon held over the matcha layer.
- Drink immediately, yum! Can be stored in the refrigerator for a couple of hours if you don’t plan on drinking it straight away.
Notes
– If you don’t feel like chopping up a big bunch of spinach, baby spinach works just as well. – Feel free to substitute the almond milk with any type of milk that you prefer. – Regarding serving sizes, I used 3x 350ml glasses and they were all filled to just under the rim. – For the pictures in this post, I froze the matcha layer a little too long so that the strawberry layer did not blend at all into the matcha layer. I used the tip of a knife to break up the frozen edges around the glass for a smoother, more blended appearance.
More resources
Still can’t find what you’re looking for? If you spot a missing recipe, please don’t hesitate to get in touch, or use one of the following useful links:
- Food and ingredient substitutes – missing an ingredient? We have probably got the answer from our hundreds of painstaking experiments.
- Reheating food – Whether you’ve got leftover cookies, cakes, or any other dish, we have the answer to the question ‘how do I best reheat this?’.
- Food storage best practices – exactly as it says on the tin. We’ve personally tested the majority of ingredients and dishes to get the most reliable answers possible.
- Serving suggestions and side dish ideas – Whatever you’ve got planned for dinner, we’ve got ideas for dishes that will complement and elevate your meals. Whatever the occasion.
- Cooking tips and tricks – there’s no such thing as a stupid question here. We cover a wide range of cooking tutorials, from things such as ‘how do I get seasoning to stick to popcorn‘ to ‘how do I save my undercooked brownies?‘. No cooking topic is out of scope.